What is Obsidian?
Obsidian has recently been introduced to me and, in short, I am having a whale of a time with it. In essence, Obsidian intends is to fill the role of becoming your second brain, providing a way to create and link concepts in a manner that is akin to how the brain operates; by recognising patterns and building relationships between ideas. The hope is that you’ll end up with a set of interconnected notes that can be freely navigated, bolstering the thought process and turbocharging our creativity!
With the notes you create and the map of concepts that you generate you start to build up your own personal knowledge base; which I think is pretty neat. 🙂
The knowledge base is formed from what Obsidian terms a vault, but don’t be fooled, this is as simple as a local folder on a target device containing standard markdown (.md) files, in the most basic sense.
The ecosystem, to my eyes, is thriving with user-generated plugins (it is incredibly extensible, which I will touch on later) and the kicker is, for personal use, it is free. One of the things I was personally looking for was a way to quickly compile notes for a vast array of concepts, with a free and reliable backup directly to GitHub; something that is easily achieved via the use of a plugin.
For the purposes of this guide, I assume Git is installed and functional, so be ready for that.
Without further ado, let’s get started!
Install Obsidian
Installing Obsidian can be done via their website found here. They allow installations on Windows, macOS and some Linux distributions. A full list of installers can be found by navigating to this link.
Get whatever flavour of installation underway that you require. Once complete, you’ll be presented with the following after you start the application:

At this point, I generated a new GitHub repository (with just a ‘README.md’ and no ‘.gitignore’, for now) and cloned this to my local machine. In the root folder of the repository, I then created a vault using the relevant Obsidian option. This resulted in, for me, the following setup whereby the repository name is ‘knowledge-vault‘ and the vault name is ‘obsidian-vault‘:
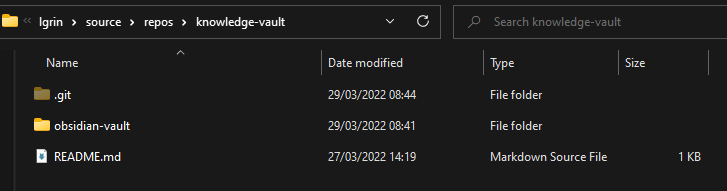
Voila! That’s a fully functional Obsidian vault ready to rock and roll. Let’s focus next on getting a plugin to manage automatically committing and pushing to our remote repository on a schedule.
Integration with GitHub
The community plugin of choice for easily enabling automatic commit/push operations to a remote repository is ‘Obsidian Git‘.
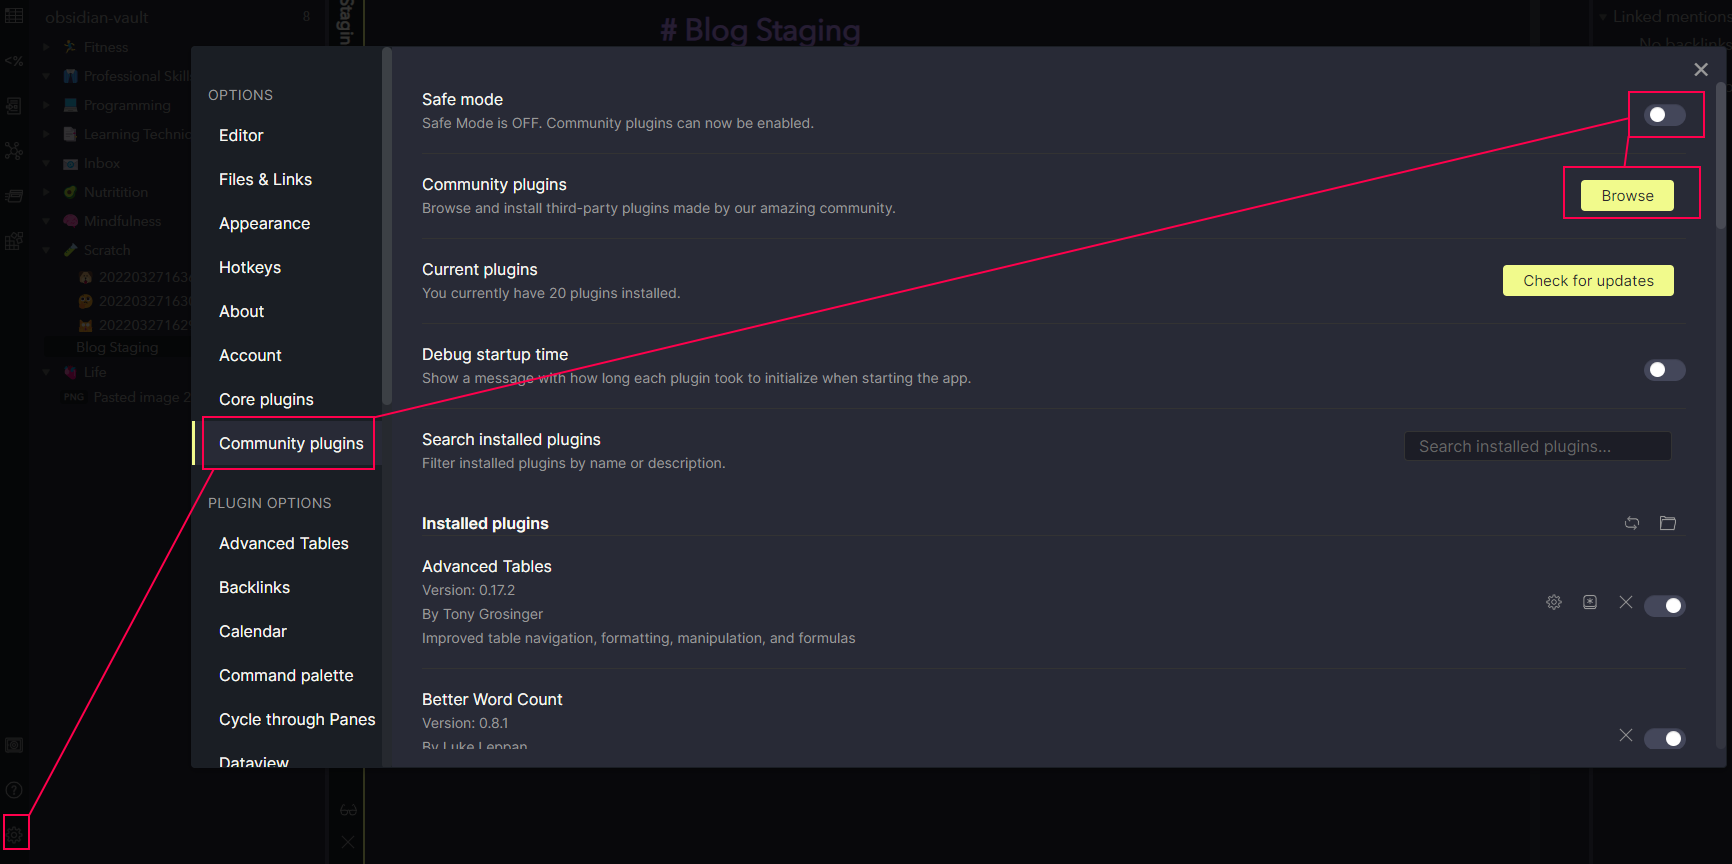
First things first, the ability to use community plugins are locked off behind a specific configuration option. You’ll find this option under ‘Settings -> Community plugins -> Safe mode‘. This does come with the caveat that community plugins do have the ability to access resources on the target device; so a degree of caution is required.
Once toggled on, you are free to browse, install and enable community plugins by clicking the ‘Browse‘ button, as indicated. The following screenshot shows the flow on how to access and adjust these settings:
Browse for and install ‘Obsidian Git‘; post-installation ensure you click the ‘enable‘ button to turn on the plugin (all plugins, that I have tried thus far, do not enable by default and wait for user confirmation in this regard). Once installed and enabled, you should see the following if searching for the plugin again; this confirms installation is successful:

After closing the search modal to return to the ‘Settings‘ modal you just need to scroll through the various settings until you reach the ‘Installed plugins‘ section; this is where you will find an entry for Obsidian Git, that allows you to access and tweak configuration settings. The plugin will use any stock credentials you have configured for your designated workspace.

This is the configuration platter of goodness that I went with, but you can tailor this fully to your taste as desired. 🍴
| Setting Name | Value |
| Vault backup interval (minutes) | 5 |
| Auto pull interval (minutes) | 0 |
| Sync Method | Rebase |
| Commit message on manual backup/commit | {{hostname}} vault backup: {{date}} |
| Commit message on auto backup | {{hostname}} vault backup: {{date}} |
| {{date}} placeholder format | DD/MM/YYYY HH:mm:ss |
| {{hostname}} placeholder replacement | Lews PC |
| List filenames affected by commit in commit body | On |
| Current branch | main |
| Pull updates on startup | On |
| Pull changes before push | On |
| Disable push | Off |
Let’s take a super-succinct tour of these settings and the exact meaning behind each one in turn. The ‘Vault backup interval (minutes)‘ is, as you’d expect, the exact time interval between each automatic commit and push operation. Every 5 minutes seems like a good balance between frequency and performance, although I have to admit I haven’t noticed any degradation as automatic commits/pushes occur. ‘Auto pull interval (minutes)‘ is set to 0 to disable this feature, but if you are interested in pulling information (as you have a shared vault) then this could be of interest.
I prefer cleaner commit history, so I have chosen ‘Rebase‘ for the ‘Sync method‘; but again, dealer’s choice here! The next four settings (‘Commit message on manual backup/commit‘, ‘Commit message on auto backup‘, ‘{{date}} placeholder format‘, ‘{{hostname}} placeholder replacement‘) enable you to tailor the commit messages generated but injecting a hostname and date (in the desired format) into a template string. Of course, you are free to omit anything you don’t want. For example, a final commit message in my repository is as follows:
Template string: '{{hostname}} vault backup: {{date}}'

Results in: 'Lews PC vault backup: 29/03/2022 19:49:58'
The ‘List filenames affected by commit in commit body‘ adds any adjusted files into the body for the commit, a personal preference of mine in this case, which results in the following effect (when viewed in GitHub):

It is possible to adjust the target branch for commit/push operations by toggling the ‘Current branch‘ setting. This could be of benefit if working on a vault using a strategy such as Git flow (or where you want to stage changes into another branch and create Pull Requests/merge into another upstream branch, perhaps in a multi-user setup).
I have opted to pull updates when the application kicks into life with the aid of the ‘Pull updates on startup‘ option. To pair nicely with this, the ‘Pull changes before push‘ setting is also enabled, although my vault will only be for my own personal use (this could be useful if I change committed markdown files from another device).
Lastly, the most important setting to alter here is ‘Disable push‘; it is critical this is turned off in order for any automatic interactions with GitHub to work.
You are now away to the races and automatic commit/push operations should trigger as you build out your own personal knowledge base (capturing configuration changes, markdown file alterations/additions, etc). For example, as I have been compiling notes for this blog post the process has been triggered numerous times. In Obsidian you will see a toast-style notification:

From a Git GUI, such as Fork, you should observe the following:

Skip over to the Obsidian Git official GitHub repository for additional information and implementation details (including information on a specific panel within Obsidian for managing commits manually).
Live Preview
A new feature (at the time of writing this article), within Obsidian, is ‘Live Preview‘ which lets you observe markdown changes on the fly, without having to switch between reader/source views. In my short time with it, I have found it seamless, so worthy of a shoutout!

Obsidian Core Plugins

Before looking at some community-driven plugins I wanted to take a very quick tour of some of the ‘Core plugins‘ bundled with Obsidian. Not all of these are enabled by default, so peruse the list and enable any that take your fancy.
I’ll run over some of the key, noteworthy and interesting ones in a quick-fire manner.
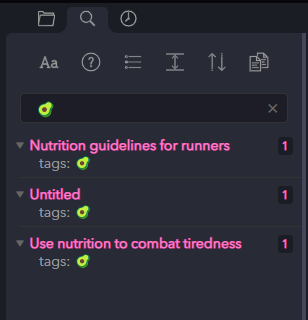
Obsidian comes with stock ‘File explorer‘ and ‘Search‘ capabilities via plugins (the standard search seems fairly powerful, below you can see a search by tag).
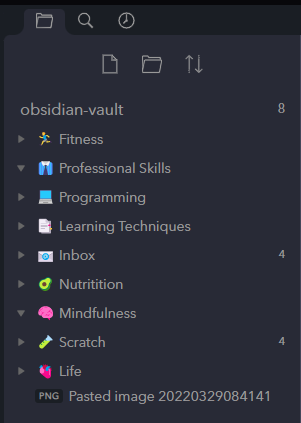
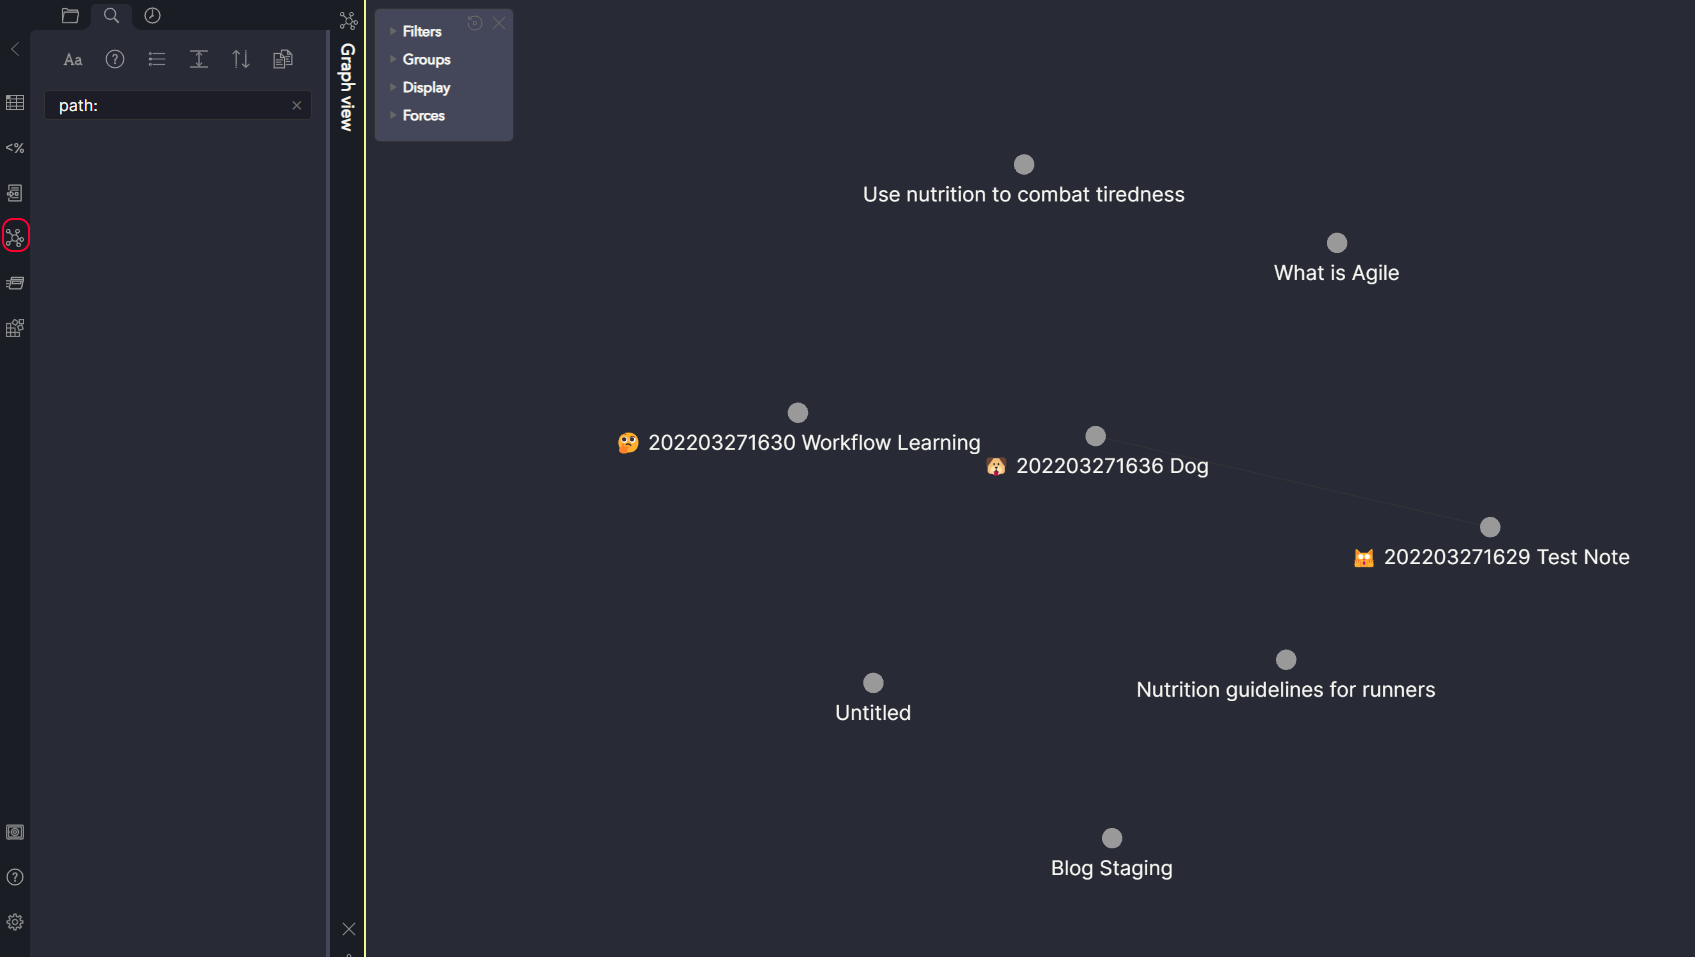
The ‘Graph view‘ really starts to expose the power of Obsidian showing a node-based diagram of the relationships between your notes (based on direct links from one note to another).
One particular core plugin that caught my eye was the ‘Audio recorder‘, allowing audio snapshots to be captured and injected directly into notes, for those that love to dictate!

The ‘Publish/Sync‘ plugins allow access to paid services to store and synchronize data; which is why I am opting for the GitHub-based approach. Pricing details can be found here if this is of interest.
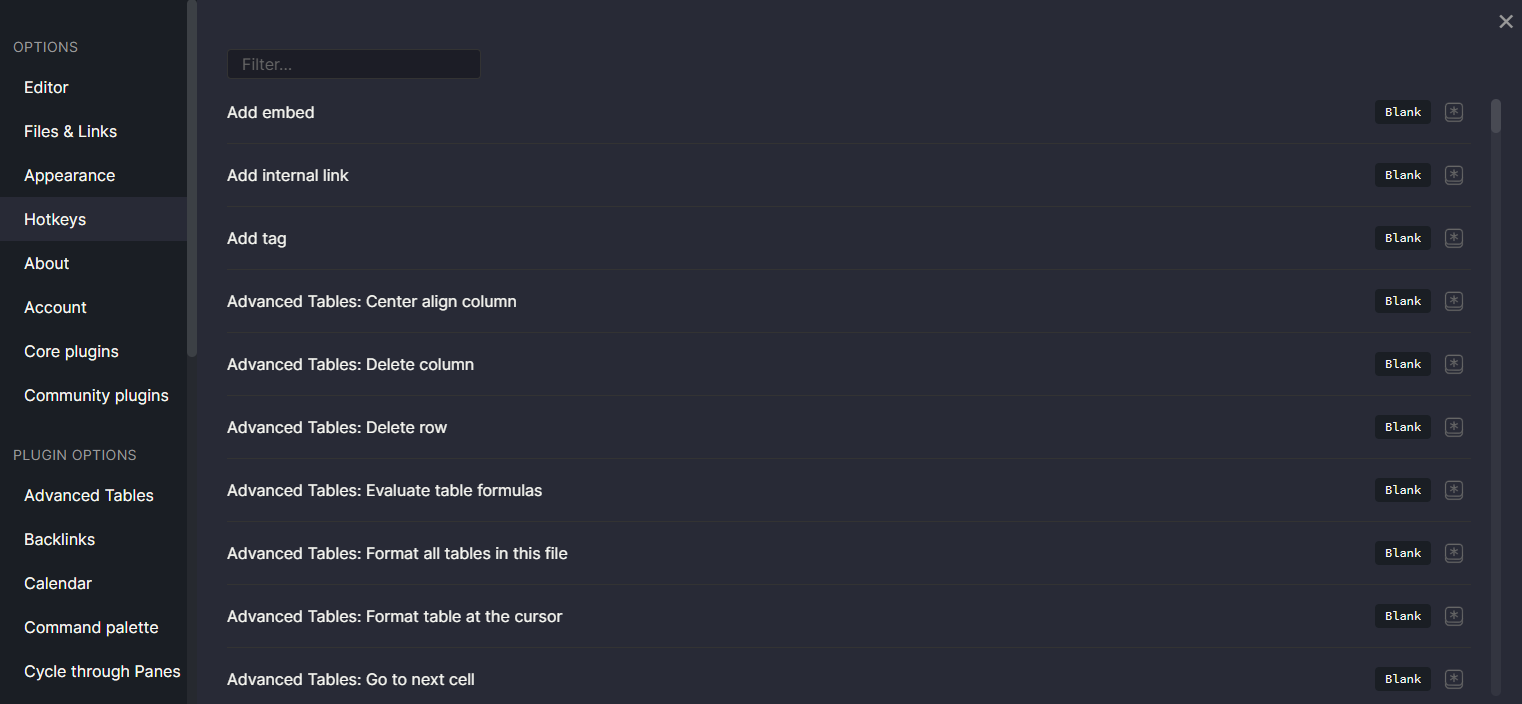
Hotkey Customisation
Obsidian allows for a decent amount of customisation when it comes to hotkeys, covering inherent functionality and any functionality added to the application via plugins. Check out the options by navigating to ‘Settings -> Hotkeys‘ to explore the full gamut of operations supporting hotkey assignment:
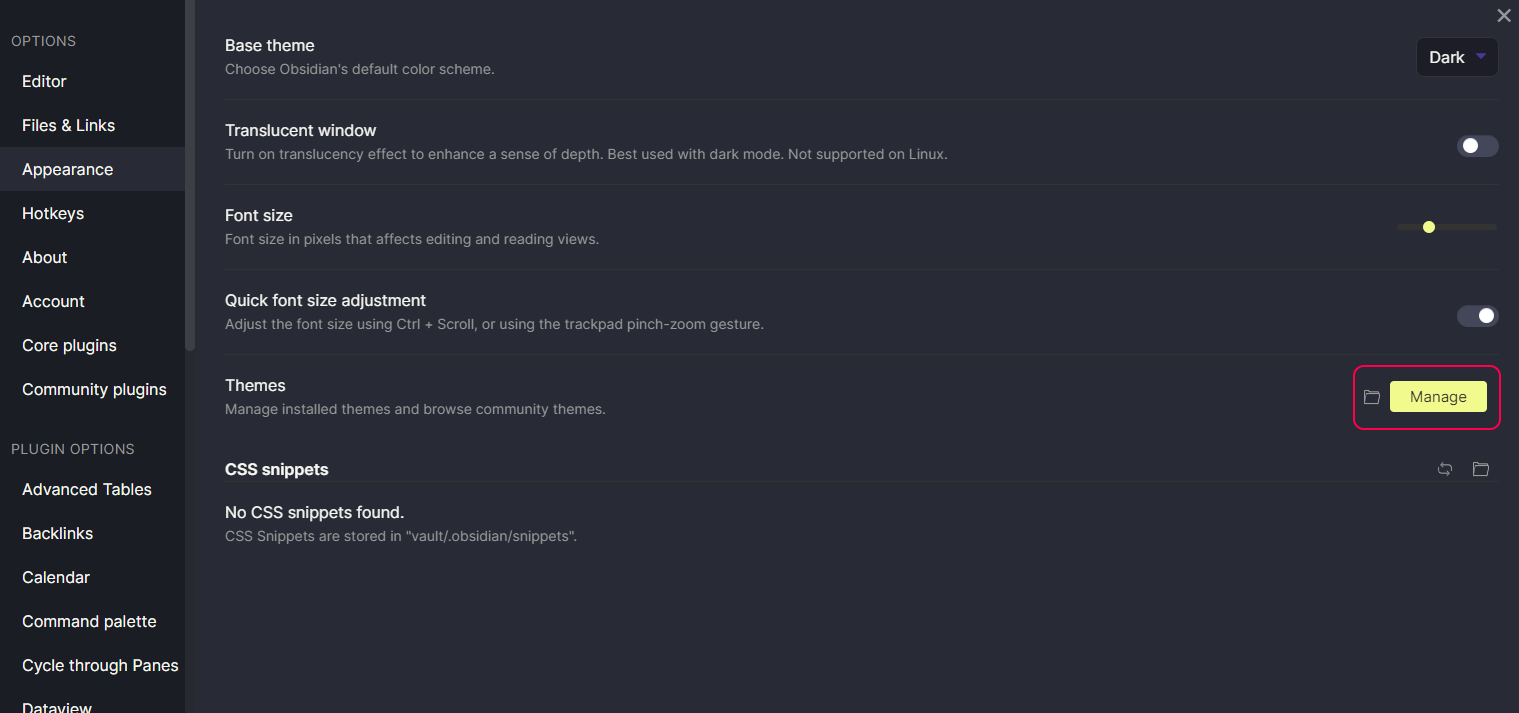
Obsidian Themes
I am a sucker (pun intended in this case! 🧛) for a great theme, and Obsidian has a nice little ecosystem of custom themes with the ability to roll your own, of course. My own personal recommendation for an awesome dark theme is ‘Dracula‘. Themes can be searched/enabled from ‘Settings -> Appearance -> Themes -> Manage‘, as shown:
The Dracula Theme official GitHub repository can be snooped at here; you know you want this one after all!
Obsidian Extensions
The following community plugins caught my attention, after a little bit of research (although I have yet to really get to grips with their full capabilities – at this stage it is about having fun on the journey).
The ‘Templater‘ plugin allows you to craft custom templates for notes, inserting the result of raw JavaScript functions, as you see fit; which over time will become an enormous time saver.
Although simple, the ‘Paste URL into selection‘ plugin has become one of my hot favourites. It allows you to highlight raw text and then paste URLs to create fully functioning links in markdown, something I tend to find a bit of a chore:

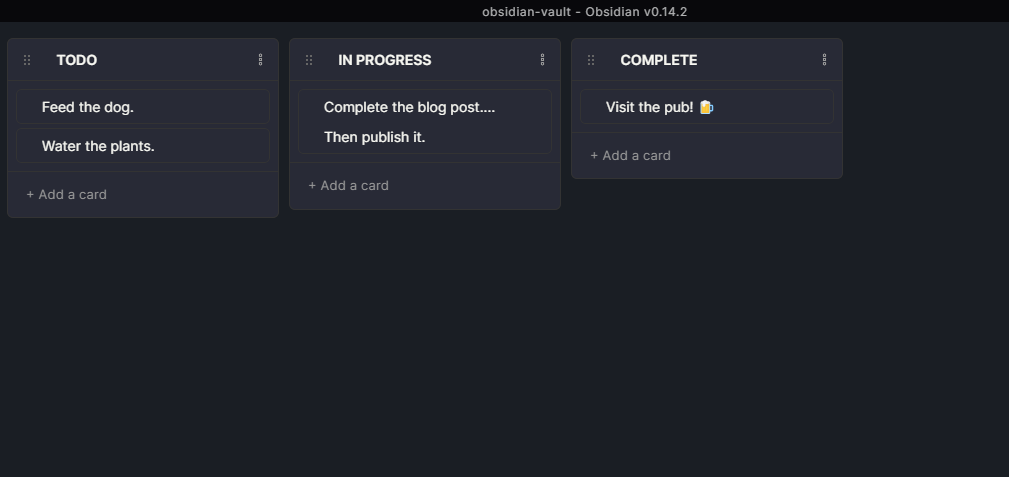
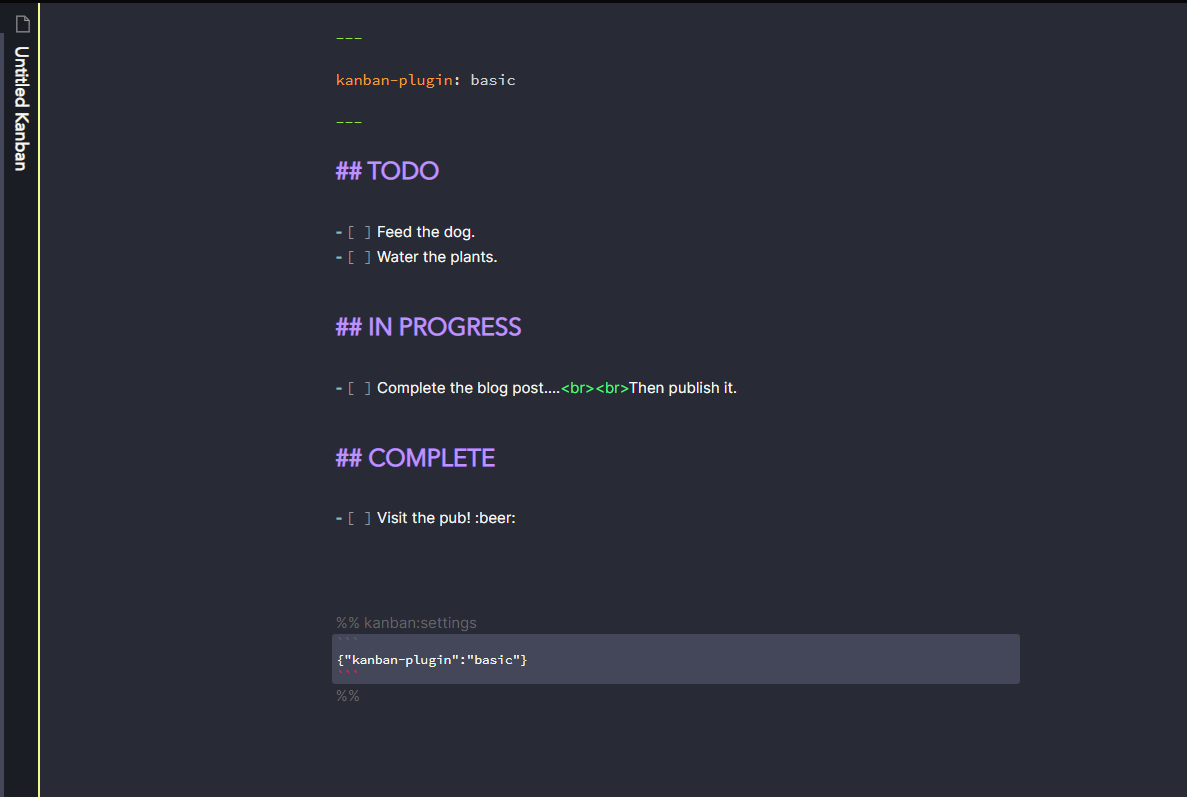
If you wish to switch up a note and turn it into a fully functional Kanban Board, the ‘Kanban‘ plugin does just that (I’ve included screens of the board view and the raw markdown, for reference).
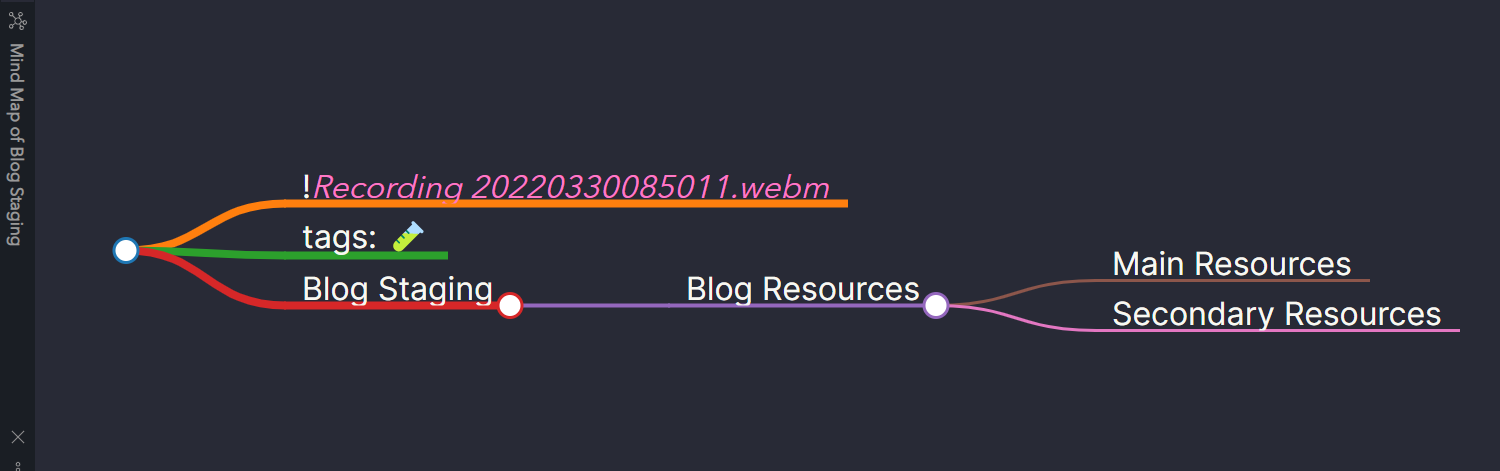
The ‘Mind Map‘ plugin shows a targeted view of the various relationships diverging off of the current note, allowing a focused view of all of the aspects of a note (for easier navigation between ideas).
If you have the desire to write more complex queries against your knowledge base data, the ‘Dataview‘ plugin enables querying by metadata using Dataview Query Language (a SQL-like syntax) or JavaScript.
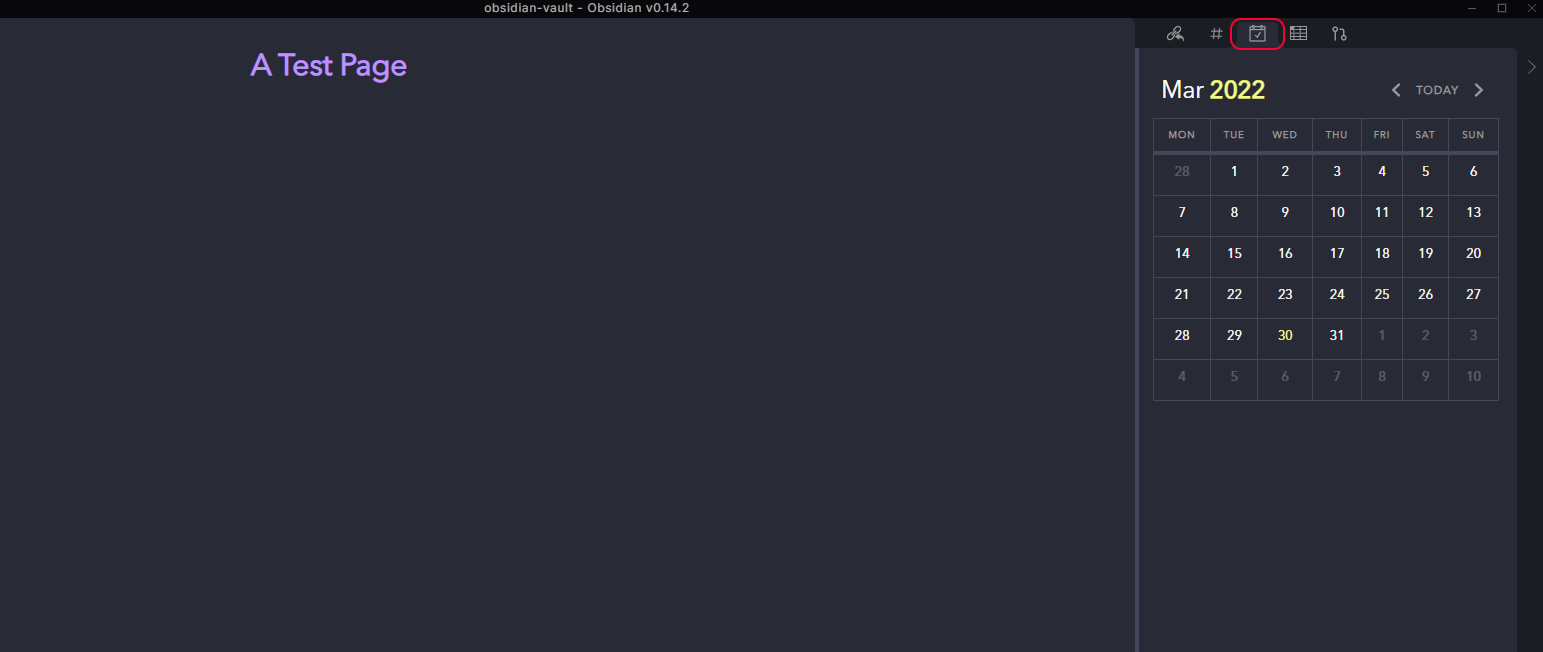
The ‘Calendar‘ plugin integrates, as you’ve probably guessed, a calendar into Obsidian. This does provide some tangible benefits, however, as it is possible to create note-based tasks that can be scheduled for review on target dates; metadata that is instantly visible on this calendar.
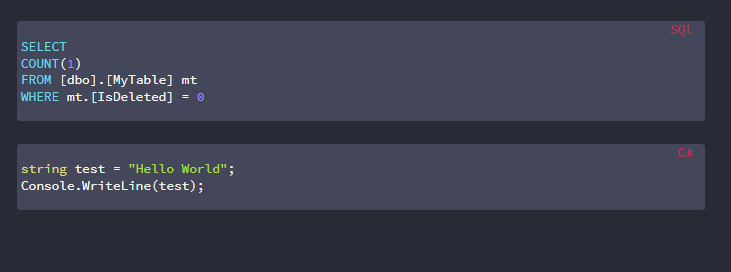
Having some kind of syntax highlighting and copy code buttons is also a boon, even if the syntax highlighting appears rudimentary (check out the ‘Editor Syntax Highlight‘ and ‘Copy button for code blocks‘ plugins).
I can definitely see that the ‘Natural Language Dates‘ plugin has legs and, in my opinion, is pretty darn swish; in this example, you’ll see the term ‘inoneweek‘ being automatically resolved.

I’ve listed the GitHub repositories for all of these plugins below so you can go full-sleuth to your heart’s content:
- Templater: https://github.com/SilentVoid13/Templater
- Paste URL into selection: https://github.com/denolehov/obsidian-url-into-selection
- Kanban: https://github.com/mgmeyers/obsidian-kanban
- Calendar: https://github.com/liamcain/obsidian-calendar-plugin
- Mind Map: https://github.com/lynchjames/obsidian-mind-map
- Dataview: https://github.com/blacksmithgu/obsidian-dataview
- Editor Syntax Highlight: https://github.com/deathau/cm-editor-syntax-highlight-obsidian
- Copy button for code blocks: https://github.com/jdbrice/obsidian-code-block-copy
- Natural Language Dates: https://github.com/argenos/nldates-obsidian
My Current Vault
If you want to check out my current vault dedicated to weird and wonderful knowledge snippets (100% a stub-fest, at the time of writing) then you can find that here.
The plan, for me at least, is to build out (and then attempt to tie together) my evolving thoughts on life, work, professional practices, programming, mindfulness, health and nutrition and see what seedlings form from the process. Perhaps these ‘seedling’ ideas will grow into something more, who knows!
Extra Resources
I would recommend this superb YouTube resource (very long but well documented with copious timestamps, which if you are a serial video jumper like me you will appreciate) for anyone wanting to go on an Obsidian journey:
As mentioned, the software itself is not open source but is highly extensible. Contributions in the form of plugins and themes are welcome and for those interested, this repository is a good starting spot.
Over to you!
I would love to hear about your experiences and journeys with Obsidian (or any go-to resources on how to manage knowledge vaults or must-have plugins to check out), drop me a comment and let me know your take.
Until the next time, happy coding out there! 💻
