Orchard Core is an open-source, modular CMS and general application framework which (as you can tell based on the name) ties to .NET Core. Multi-tenancy is very much at the root of what the project aims to deliver. A nice component here is that Orchard Core has been reimagined for .NET Core completely, rather than re-jiggled based on the legacy version.
With this coming up in conversation recently it seemed like a great candidate to investigate in more depth.
Being open-source you can gain access to the source code on GitHub. It looks to have a solid base of contributors and a nice stream of commits; a positive kind of hubbub. I’ve included some general links below that I think maybe beneficial for anyone getting started:
- The roadmap can be found here: Orchard Core Roadmap.
- General documentation can be found here: Orchard Core Documentation.
- Nice bonus; Docker images for Windows/Linux can be found here: Orchard Docker Images.
- A pretty active looking forum can be found here: Orchard Core Forum.
The website also advertises the fact that a podcast runs every Tuesday at noon (PT), so if that’s your thing then go and check it out.
For starters, there are two general offerings in play, as detailed in the documentation:
- Orchard Core Framework: An application framework for building modular, multi-tenant applications on ASP.NET Core.
- Orchard Core CMS: A Web Content Management System (CMS) built on top of the Orchard Core Framework.
I’ll be looking at the framework primarily as part of this post, following along with the samples and showing you the general process as I go. I’ll circle back around to tackle the CMS component separately as part of another post.
However, before moving forward I wanted to see what was offered when using the ‘demo link‘, which allows you to create a sample site. Here’s the general setup I went with:

Off the back of this, you’ll receive an email with a link to your demo site, along with a link to access the administration section (credentials included).
The starter site, based on the template selected, looks like this:

The admin offering is presented in the following way:

I’ll list out some of the core things I can see here in the admin module, without ramming every single menu option down your throat!
- New: allows the creation of new Articles, Blogs and Pages (including Liquid Pages).
- Blog: create/edit, etc. Blog posts on your site.
- Main Menu: customise the main navigation menu on the site.
- Content: allows granular access to the various kinds of content on the site as well as the configuration of Assets (i.e. media).
- Content Definition: allows access to ‘Content Types’ and ‘Content Parts’ – for example does the content support versioning and what Fields/Parts are assigned. It looks like a good number of options are available.
- Configuration: a gamut of options on show, allowing customisation of page regions, site access, site searchability and import/export settings, amongst many other options.
- Themes: allows access to themes for the site/admin areas.
The general feel here will make any .NET developer comfortable I suspect and is probably an easy enough read for most others to get involved in short order. I did notice that I was able to create duplicate blog post entries, via a publish button ‘mash’; but the process was otherwise seamless. I managed to tweak the site easily enough, adding a further article, post and tweaking the theme:

With a little feel for the CMS under my belt let’s look more at how we can use the physical framework underpinning this.
Orchard Core Framework
This framework, as the documentation stresses, is very much independent of the physical CMS offerings. Samples are available here, which are designed to get you started building modular, multi-tenant applications.
The sample documentation leads you straight to a handy-dandy YouTube video (which I digested as best as I could; it looks to have been part of .NET Conf 2019): Building modular, multi-tenant ASP.NET Core apps with Orchard Core Framework.
Modular Applications
At this stage, I ended up taking a couple of evenings to piece together the sample we’re about to take a look at. So what’s the deal with the Orchard Core Framework, why is it useful?
Well, the main offering here allows a clear ‘divide’ of your application into modular pieces, allowing splitting of functionality and even the ability to allow multiple teams to more easily work on various parts of your application.
Re-usable modules allow the centralisation and sharing of core components such as static assets, middleware and full-on domain areas of an application (like e-commerce, authentication, user management, etc.).
The last nice cherry on top is that any module you write is a prime candidate for packaging and sharing, via NuGet (therefore, publically – Orchard Core seems very interested in garnering a strong community of module publishers/consumers).
The primary idea is that you have:
1) An Orchard Core ‘target’ application as a module consumer.
2) Various modules for the ‘target’ application to hook into and directly consume.
That’s it! Multi-tenant applications are an added benefit, which I will discuss after we peer over the sample code.
Getting Started
I’ll make the entire sample available on GitHub but let’s walk through the basics.
We need a module consumer so for this purpose, I’ve created, via Visual Studio, a new ‘ASP.NET Core Web Application’. You can essentially work-around the setup with any template you like, I’ve found that the ‘Web Application’ (Razor Pages) template gave me enough of the barebones content that I wanted, without too much fat to trim – a good compromise overall. The application in this sample is set to use .NET Core 3.1.
To convert the application into a modular application (or module consumer) the ‘OrchardCore.Application.Mvc.Targets’ NuGet package should be installed (there is a non-MVC variant also, but I’ll be going down this route). I one hundred per cent stalled here for a good few minutes, before realising that I had not checked the ‘Include prerelease’ checkbox; make sure you click this (as of March 2020 anyway, you may need to check the release status of the project if you are following along).

Nice! From a basic standpoint, there are only a few other code-based alterations to make.
Inside the ‘Startup.cs’ file Orchard Core must be brought into scope within the ‘ConfigureServices’ method, overwriting any existing content generated from the ‘Web Application’ template:
/// <summary>
/// This method gets called by the runtime. Use this method to add services to the container.
/// </summary>
/// <param name="services">An <see cref="IServiceCollection"/> type ready to gather up registered dependencies.</param>
public void ConfigureServices(IServiceCollection services)
{
    // Add the MVC 'flavour' of Orchard Core
    services.AddOrchardCore().AddMvc();
}
Then, inside the ‘Configure’ method simply delete the calls to ‘app.UseAuthorization’ (as we won’t be supporting it for this demo) and ‘app.UseEndpoints’ and replace it with the following code:
/// <summary>
/// This method gets called by the runtime. Use this method to configure the HTTP request pipeline.
/// </summary>
/// <param name="app">Allows alterations to the application's request pipeline.</param>
/// <param name="env">Allows access to the web hosting environment the application is running on.</param>
public void Configure(IApplicationBuilder app, IWebHostEnvironment env)
{
    if (env.IsDevelopment())
    {
        app.UseDeveloperExceptionPage();
    }
    else
    {
        app.UseExceptionHandler("/Error");
        // The default HSTS value is 30 days. You may want to change this for production scenarios, see https://aka.ms/aspnetcore-hsts.
        app.UseHsts();
    }

    app.UseHttpsRedirection();
    app.UseStaticFiles();
    app.UseRouting();

    // Configure the application to be a modular, Orchard application
    app.UseOrchardCore();
}
At this point, the application should run but we haven’t created any projects to act as modules, for our application to consume.
Creating a Module
For the modules in this sample project, I went slightly off-piste and used the ‘ASP.NET Core Web Application’ project type again but, this time, with the ‘API’ template. This seems to fit OK and follows the general samples I have seen.
Ensure the project definition is as follows, with the ‘Sdk’ attribute set to ‘Microsoft.NET.Sdk.Web’ and ‘OutputType’ set to ‘Library’:
<Project Sdk="Microsoft.NET.Sdk.Web">

  <PropertyGroup>
    <TargetFramework>netcoreapp3.1</TargetFramework>
    <OutputType>Library</OutputType>
  </PropertyGroup>

  ...

</Project>
With that done, the module also needs to have a NuGet package installed. Again, with the ‘Include prerelease’ flag set, adding the ‘OrchardCore.Module.Targets’ package will see the project readied as a module.

Linking the Application and Module
This is the easy part. For an Orchard Core target application to gain ‘awareness’ of a module you just need to add a reference from the application to the module project! This is something that I like, no complex or easy to trip up on registration, etc.

Full Module Sample
The sample code I’ve generated illustrates three separate modules, each surrounding various types of Lorem Ipsum generation (with some rough UIs in place, just to keep each module distinct). The modules themselves have a fair bit of commonality so I will go through the ‘JeffSum.Module’ in detail and then, as a follow-up, discuss only areas of the other modules; largely to just save your sanity!
JeffSum.Module
Let’s start! The ‘Program.cs’, ‘WeatherForecastController.cs’ and ‘WeatherForecast.cs’ files get ditched in favour of the following project structure:

I wanted to illustrate a module that contained logic, service calls, UI and static assets (JavaScript and CSS) and how some of these elements work out of the box.
My first observation is that there are no quirks with using the modules Startup class to register services. Dependency Injection, in basic terms, works wonderfully.
using JeffSum.Services;
using JeffSum.Services.Interfaces;
using Microsoft.Extensions.DependencyInjection;

namespace JeffSum.Module
{
    /// <summary>
    /// Core class that sets up the module for use.
    /// </summary>
    public class Startup
    {
        /// <summary>
        /// Configures dependencies (such as services) for use throughout the module, as
        /// injected entities, for example.
        /// </summary>
        /// <param name="services">An <see cref="IServiceCollection"/> type ready to gather up registered dependencies.</param>
        public void ConfigureServices(IServiceCollection services)
        {
            services.AddScoped<IJeffIpsumService, JeffIpsumService>();
        }
    }
}
The ‘JeffIpsumService’ has the responsibility for generating Jeff Goldblum Lorem Ipsum goodness. 😀
The service itself is abstracted away in a .NET Standard 2.0 library, as shown here:
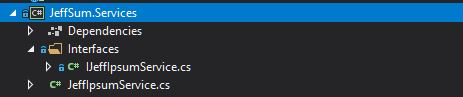
The abstractions are in place to test that using modular setups didn’t impose any unforeseen restrictions. ‘IJeffIpsumService’ and ‘JeffIpsumService’ are implemented as follows:
using Services.Shared.Interfaces;

namespace JeffSum.Services.Interfaces
{
    /// <summary>
    /// Interface for any customisations to (and for easier DI of) the
    /// Jeff Ipsum service types.
    /// </summary>
    public interface IJeffIpsumService : IIpsumService
    {
    }
}
using Jeffsum;
using JeffSum.Services.Interfaces;
using System.Collections.Generic;
using System.Linq;
using System.Threading.Tasks;

namespace JeffSum.Services
{
    /// <summary>
    /// Represents a service that provides Jeff Goldlum
    /// style Ipsum content.
    /// </summary>
    public class JeffIpsumService : IJeffIpsumService
    {
        /// <summary>
        /// Gets the desired amount of paragraphs of Jeff-related
        /// Lorem Ipsum content from 'JeffSum' library.
        /// </summary>
        /// <param name="paragraphCount">The amount of paragraphs of content to generate.</param>
        /// <returns>A <see cref="List{string}"/> holding the generated Lorem Ipsum content.</returns>
        public async Task<List<string>> GetIpsumParagraphsAsync(int paragraphCount) => await Task.Run(() => Goldblum.ReceiveTheJeff(paragraphCount).ToList());
    }
}
Back inside the ‘JeffSum.Module’, the singular View hosted here has access to a small amount of custom styling and functionality via ‘jeff-index.css’ and ‘jeff-index.js’:
/* Override styles for the 'JeffSum.Module' Orchard Module - contains a consistent style for module buttons (for illustration only) */
.module-button {
    min-width: 200px;
}
// Function that performs a physical copy of content (from the designated text area) to the clipboard
function performCopy() {
    document.querySelector('#JeffIpsumContentTextArea').select();
    document.execCommand('Copy');
}

// Function that handles UI alterations to the 'Copy to Clipboard' button, along with the actual copy!
function copyToClipboard(buttonElement) {
    if (buttonElement) {
        buttonElement.innerText = "Copied!";

        performCopy();

        setTimeout(() => buttonElement.innerText = "Copy to Clipboard", 2000);
    }
}

// 'Copy to Clipboard' button click handler
document.querySelector('#CopyToClipboardButton').addEventListener('click', el => copyToClipboard(el.target));
These reside in a ‘wwwroot’ folder, no different to how you would normally expect this to be rigged.
The JeffController exposes the single Index action, injecting the ‘IJeffIpsumService’ for use via the magic of ‘[FromServices]’. The service is called which builds a View Model for the View to consume (with a bit of string trickery), easy-peasy.
using JeffSum.Module.ViewModels;
using JeffSum.Services.Interfaces;
using Microsoft.AspNetCore.Mvc;
using System;
using System.Collections.Generic;
using System.Threading.Tasks;

namespace JeffSum.Module.Controllers
{
    /// <summary>
    /// A controller that exposes Jeff Goldblum
    /// style Ipsum content.
    /// </summary>
    [Route("GiveMeJeff")]
    public class JeffController : Controller
    {
        /// <summary>
        /// Returns an <see cref="IActionResult"/> for rendering
        /// Jeff Goldblum style Ipsum content to the appropriate View.
        /// </summary>
        /// <param name="jeffIpsumService">A service for 'receiving the Jeff'.</param>
        /// <returns>Jeff Goldblum Ipsum content to the designated View (fixed to 5 paragraphs, for example purposes).</returns>
        public async Task<IActionResult> Index([FromServices] IJeffIpsumService jeffIpsumService)
        {
            // Split paragraph content with new lines before passing into the View Model (for the View to consume)
            List<string> rawIpsumParagraphs = await jeffIpsumService.GetIpsumParagraphsAsync(5);
            string formattedIpsumParagraphContent = string.Join($"{ Environment.NewLine }{ Environment.NewLine }", rawIpsumParagraphs);

            return View(new JeffIpsumViewModel(formattedIpsumParagraphContent));
        }
    }
}
The key thing to notice here is the attribute adorning the controller ([Route]).
As shown in screenshots here, the default mechanism is for endpoints to be discovered by Orchard Core using ‘ModuleName/Controller/Action’:

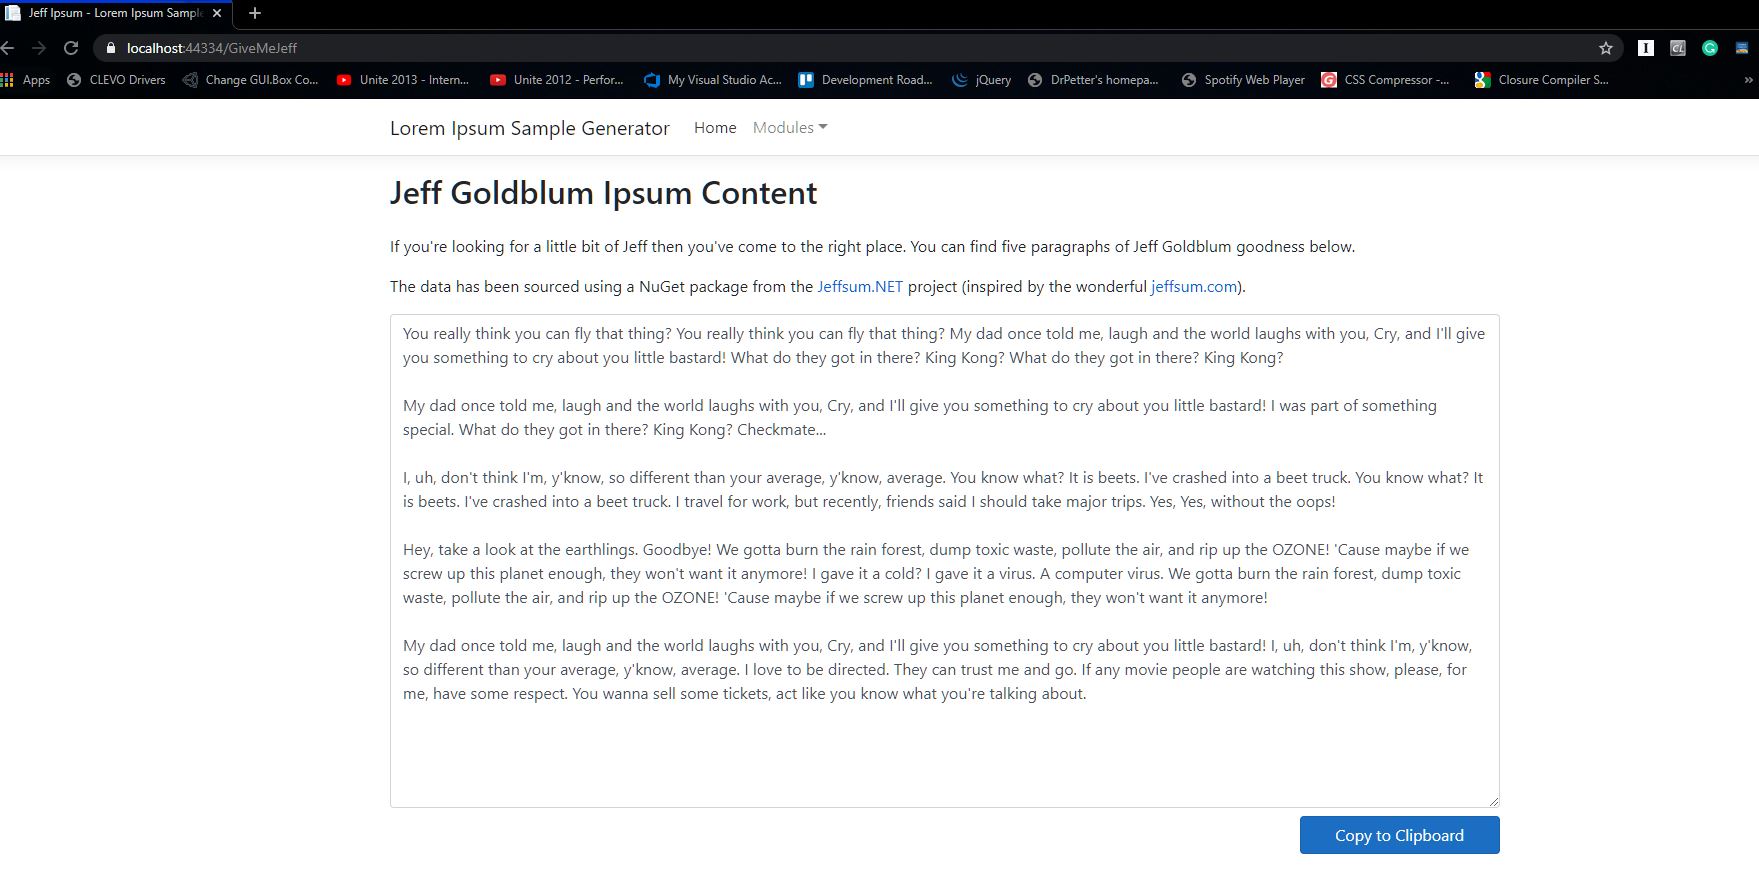
But, this can be overridden in a basic sense using the ‘Route’ attribute (which I’ve opted to do):

The demo that I watched made mention that conflicts, of course, can occur and that care is needed to avoid getting into sticky situations (worth noting!).
The View Model is about as basic as it comes, added primarily just for illustration at this point:
namespace JeffSum.Module.ViewModels
{
    /// <summary>
    /// A View Model for wrapping Jeff Goldblum Ipsum
    /// content rendered in the designated View/s.
    /// </summary>
    public class JeffIpsumViewModel
    {
        /// <summary>
        /// Initializes a new instance of the <see cref="JeffIpsumViewModel"/> class. Wraps
        /// Jeff Goldblum Ipsum content for general consumption.
        /// </summary>
        /// <param name="jeffIpsumContent">The paragraph content to render.</param>
        public JeffIpsumViewModel(string jeffIpsumContent) => JeffString = jeffIpsumContent;

        /// <summary>
        /// Gets access to the Jeff Goldblum Ipsum paragraph content.
        /// </summary>
        public string JeffString { get; }
    }
}
The View exposes some simple explanatory text and allows Jeff Goldblum joy to be copied to the clipboard from a text area.
@using JeffSum.Module.ViewModels;
@model JeffIpsumViewModel
@{
    ViewData["Title"] = "Jeff Ipsum";
}
@section Styles {
    <link rel="stylesheet" href="~/JeffSum.Module/css/jeff-index.css" />
}
@section Scripts {
    <script type="text/javascript" src="~/JeffSum.Module/js/jeff-index.js"></script>
}
<div>
    <!--Header and text content-->
    <h2 class="mb-4">Jeff Goldblum Ipsum Content</h2>
    <p>If you're looking for a little bit of Jeff then you've come to the right place. You can find five paragraphs of Jeff Goldblum goodness below.</p>
    <p>The data has been sourced using a NuGet package from the <a href="https://github.com/jamesmontemagno/Jeffsum.NET" target="_blank">Jeffsum.NET</a> project (inspired by the wonderful <a href="http://jeffsum.com/" target="_blank">jeffsum.com</a>).</p>
    <!--Text area content/copy button-->
    <textarea id="JeffIpsumContentTextArea" class="form-control mb-2" rows="20">@Model.JeffString</textarea>
    <button id="CopyToClipboardButton" class="float-right btn btn-primary module-button">Copy to Clipboard</button>
</div>
Notice here that I can use the ‘@section’ declarations, from the ‘_Layout.cstml’ of the target application, to add my static assets. The paths used in the ‘src’ and ‘href’ attributes make use of the module name directly, for discoverability.
NOTE: It appears possible to work with static assets in a much better way via means of a ‘Resource Manifest’. I’ve included a link here for those who want to fish around further:
Resource Management in Orchard Core
Lastly, a ‘_ViewStart.csthml’ is included in this case so we can make use of the target applications configuration; nothing more, nothing less…so awesome!
@{
    Layout = "_Layout";
}
Generating Anchor Links
This bit caught me out and took a while to get my head around (aka finding the documentation that pointed this out!!!).
Modules, from an MVC perspective, are treated like ‘Areas’ so when creating links using tag helpers (by default) a little care is needed to get this working (our applications Index View makes this apparent):
@page
@model IndexModel
@{
    ViewData["Title"] = "Home page";
}
<div class="text-center">
    <h1 class="display-4">Lorem Ipsum Orchard Module Host</h1>
    <p>This is a sample application that hosts three different flavours of Lorem Ipsum generation.</p>
    <p>Use the navigation links above or buttons below to inspect the three different modules at work: JeffSum.Module, HipsterIpsum.Module and DinoIpsum.Module.</p>
    <div class="button-grouping">
        <!--Customised links to Orchard Core configured modules-->
        <a class="btn btn-primary" asp-area="JeffSum.Module" asp-controller="Jeff" asp-action="Index">JeffSum.Module</a>
        <a class="btn btn-primary" asp-area="HipsterIpsum.Module" asp-controller="Hipster" asp-action="Index">HipsterIpsum.Module</a>
        <a class="btn btn-primary" asp-area="DinoIpsum.Module" asp-controller="Dino" asp-action="Index">DinoIpsum.Module</a>
    </div>
</div>
Simply define the ‘asp-area’ attribute using the full module name, along with the ‘asp-controller’ and ‘asp-action’ attributes and all should be well.
Although I didn’t tackle this as part of the sample code it looks to be possible to work with custom route setups, so (I don’t think!) you’re stuck in this regard.
Here is the result:

Plus, as a bonus, here are the other two modules in all their glory (which essentially call two APIs to source other types of Lorem Ipsum content, with tweaked UIs):


Other Modules
The other modules are largely constructed in the same manner; utilising services to call an API. I managed to successfully use Application Settings without any major hiccups.
using HipsterIpsum.Services.Interfaces;
using Microsoft.Extensions.Configuration;
using Modules.Shared.Configuration;
using Services.Shared.Base;
using System.Collections.Generic;
using System.Threading.Tasks;

namespace HipsterIpsum.Services
{
    /// <summary>
    /// An implementation of the <see cref="IHipsterIpsumService"/> interface for
    /// retrieving hipster-related Lorem Ipsum content.
    /// </summary>
    public class HipsterIpsumService : BaseApiService, IHipsterIpsumService
    {
        /// <summary>
        /// Initializes a new instance of the <see cref="HipsterIpsumService"/> class.
        /// Chains in relevant services as needed.
        /// </summary>
        /// <param name="configProvider">An <see cref="IConfiguration"/> type allowing access to application settings - passed to the base class.</param>
        public HipsterIpsumService(IConfiguration configProvider)
            : base(configProvider)
        {
        }

        /// <summary>
        /// Gets the desired amount of paragraphs of hipster-related
        /// Lorem Ipsum content from the API specified.
        /// </summary>
        /// <param name="paragraphCount">The amount of paragraphs of content to generate.</param>
        /// <returns>A <see cref="List{string}"/> holding the generated Lorem Ipsum content.</returns>
        public async Task<List<string>> GetIpsumParagraphsAsync(int paragraphCount)
        {
            string apiUrl = string.Format(ConfigurationProvider.GetSection(ConfigurationKeys.ApiConfig).Get<ApiConfiguration>().HipsterIpsumApiUrl, paragraphCount);

            return await GetApiResultAsync<List<string>>(apiUrl);
        }
    }
}
using DinoIpsum.Services.Interfaces;
using Microsoft.Extensions.Configuration;
using Modules.Shared.Configuration;
using Services.Shared.Base;
using System.Collections.Generic;
using System.Linq;
using System.Threading.Tasks;

namespace DinoIpsum.Services
{
    /// <summary>
    /// An implementation of the <see cref="IDinoIpsumService"/> interface for
    /// retrieving dino-related Lorem Ipsum content.
    /// </summary>
    public class DinoIpsumService : BaseApiService, IDinoIpsumService
    {
        /// <summary>
        /// Initializes a new instance of the <see cref="DinoIpsumService"/> class.
        /// Chains in relevant services as needed.
        /// </summary>
        /// <param name="configProvider">An <see cref="IConfiguration"/> type allowing access to application settings - passed to the base class.</param>
        public DinoIpsumService(IConfiguration configProvider)
            : base(configProvider)
        {
        }

        /// <summary>
        /// Gets the desired amount of paragraphs of dino-related
        /// Lorem Ipsum content from the API specified.
        /// </summary>
        /// <param name="paragraphCount">The amount of paragraphs of content to generate.</param>
        /// <returns>A <see cref="List{string}"/> holding the generated Lorem Ipsum content.</returns>
        public async Task<List<string>> GetIpsumParagraphsAsync(int paragraphCount)
        {
            string apiUrl = string.Format(ConfigurationProvider.GetSection(ConfigurationKeys.ApiConfig).Get<ApiConfiguration>().DinoIpsumApiUrl, paragraphCount);

            List<List<string>> generatedParagraphs = await GetApiResultAsync<List<List<string>>>(apiUrl);

            // Here, content comes from the API as an array of arrays, so carefully manipulate the content using string.Join for flat lists
            return generatedParagraphs.Select(gp => string.Join(" ", gp)).ToList();
        }
    }
}
For extra bells and whistles, I tucked away an abstract base class into a separate project to serve up some shared members for service-based types. I’m in danger of going off on a tangent, however!
using Microsoft.Extensions.Configuration;
using Newtonsoft.Json;
using System.Net.Http;
using System.Threading.Tasks;

namespace Services.Shared.Base
{
    /// <summary>
    /// Abstract base class for all API-based services.
    /// </summary>
    public abstract class BaseApiService
    {
        /// <summary>
        /// Initializes a new instance of the <see cref="BaseApiService"/> class.
        /// Chains in relevant services as needed.
        /// </summary>
        /// <param name="configProvider">An <see cref="IConfiguration"/> type allowing access to application settings.</param>
        public BaseApiService(IConfiguration configProvider)
        {
            ConfigurationProvider = configProvider;
        }

        /// <summary>
        /// Gets access to application settings, as required by this
        /// class (future support) or any derived types.
        /// </summary>
        protected IConfiguration ConfigurationProvider { get; }

        /// <summary>
        /// Overridable method for making a simple API request (GET).
        /// </summary>
        /// <typeparam name="T">The type requested as a result of deserialization of response data.</typeparam>
        /// <param name="apiUrl">The API URL to call.</param>
        /// <returns>Deserialized response data as the requested type.</returns>
        protected virtual async Task<T> GetApiResultAsync<T>(string apiUrl)
        {
            T requestedReturnValue;

            using (HttpClient client = new HttpClient())
            {
                string response = await client.GetStringAsync(apiUrl);
                requestedReturnValue = JsonConvert.DeserializeObject<T>(response);
            }

            return requestedReturnValue;
        }
    }
}
Rig Modules for Packaging
You can rig packages for local publishing easily enough by adding this to the module project definition:
<IsPackable>true</IsPackage>
<PackageVersion>A VERSION</PackageVersion>
Something like Azure DevOps could be brought into the fold here to generate/publish packages, so the sky is the limit!
Multi-tenant Applications
To avoid further bloating my sample I didn’t include how to enable multi-tenancy in my sample.
However, it isn’t too much bother to get started. All you need to do is to add the following code within the ‘ConfigureServices’ method:
services.AddOrchardCore().AddMvc().AddTenants();
As a starting point, it’s possible via configuration to setup tenant settings (features, custom settings and URL-prefix mappings) like this:
"OrchardCore": {
   "Default": {
      "State": "Running",
      "RequestUrlHost": null,
      "Features": [],
      "CustomSetting": "Custom setting for Default tenant"
   },
   "CustomerA": {
      "State": "Running",
      "RequestUrlHost": null,
      "RequestUrlPrefix": "customer-a",
      "Features": ["ECommerge" ],
      "CustomSetting": "Custom setting for Customer A"
   },
   "CustomerB": {
      "State": "Running",
      "RequestUrlHost": null,
      "RequestUrlPrefix": "customer-b",
      "Features": ["ECommerce", "WebApi" ],
      "CustomSetting": "Custom setting for Customer B"
   }
}
The ‘Big Why’❓
This kind of setup is perfect for SaaS applications (Software As A Service). The example used in the materials I poured over was WordPress.com; a single entity that hosts multiple, isolated websites.
Orchard Core provides the ability to use techniques like domain prefixing to allow users access to bespoke features and themes, for example (i.e. ‘myservice.com/customer1’ or ‘myservice.com/customer2’).
A gateway is also offered here into more complex scenarios whereby you may want to offer various clients separate middleware or authentication options; there is a gamut of possibilities.
Show Me the Code!
As you wish! It can be found on GitHub here. Feel free to fork and play around with the sample (on that note, I’ll be trying to tune my GitHub repositories soon so they are easier to view/work with).
Based on the size of this post it’s best to bring this to a close and discuss the CMS-specific portion of Orchard Core as a follow-up.
Thanks for tuning in and hanging on in there, best wishes to you all!

Thanks!!! You have sparked my curiosity!
LikeLiked by 1 person
Nice overview of the Decoupled CMS approach supported by Orchard Core.
However, in my limited experience, developing against the CMS, i.e.building ones own Themes can get very complex quickly, writing Controllers, registering and writing DisplayManagers (to generate shapes)and associated DisplayManagement Views, building shape display logic in DisplayDrivers, then the CSHTML to render them based upon their DisplayType all just to display a piece of model data. I haven’t investigated the other essential feature of a CMS such as role access, routing, resource management, caching, search etc.. but hopefully they have a simpler architecture.
Worth mentioning though is the CMS’s performance, it’s really fast!
LikeLiked by 1 person
Thanks for the comment, very much appreciated. As to the extended layers, absolutely (I can see how these could stack up somewhat). Perhaps something for me to revisit in future! All the best!
LikeLike
Hi – great article, which helps a lot.
Do you still plan to do something on CMS-specific for Orchard?
I’m wondering about the best setup for a multi-tenancy of decoupled sites. Meaning you have access to each CMS admin for every site but build each site like a MVC with views or more simple with pages.
Especially I wonder how you can access each of these sites url-wise. In my own efforts everything I do seem to show the default sites pages.
But thanks again for a very helpfull article.
Lars
LikeLiked by 1 person
Hi there, thank you so much (and apologies for the time it’s taken to come back)! I don’t have any firm plans to circle around at the moment but never say never 🙂 – if there is a specific thing that you did want me to hone in on (like multi-tenancy, etc.) then let me know.
LikeLike
Interesting article, thanks for the write up. I have a question around “IJeffIpsumService”. According to your code posted, it doesn’t define any method signatures so how can it access “GetIpsumParagraphsAsync” in “JeffController”. Am I missing something
LikeLiked by 1 person
Hi there, thanks for the comment. I 100% had to stare at it intensely for a minute to remember; ‘IJeffIpsumService’ inherits ‘IIpsumService’, which is where the method signature for ‘GetIpsumParagraphsAsync’ is defined (this interface is used and inherited by other service interfaces, to force the exposure of this method on related services). The source can be found here:
https://github.com/bearandhammer/orchard-core-sample/blob/master/Services.Shared/Interfaces/IIpsumService.cs
Give me a shout if you need anything else. All the best
LikeLike