What are we up to then and why?
With the licensing changes around Docker Desktop, I’ve been on a journey to investigate the possibilities of just running the Docker Engine, with other kinds of tooling and WSL 2 (Windows Subsystem for Linux). For someone who is mostly focusing (at the moment) on leveraging this for development purposes, I’m happy to not be mired in licensing woes; with a bonus being that I get some further understanding of the ‘guts’ around how all of this operates.
I’ve pooled together numerous sources and gone through the basic setup I followed. Where I have bolted together components from other articles/blogs I have provided a detailed breakdown to cite all sources (so many thanks to everyone who has produced excellent content on this so far).
Here’s how my adventure went down, buckle up!
Just give me the code you say!
I’m currently looking at options for managing code blocks more efficiently. The code blocks you’ll see are in an ‘old style’, but if you want a fully consumable and digestible version of the code snippets I recommend you hop on over to my GitHub repository:
WSL 2 for Windows and Docker Engine Support
If you want a more detailed run-through on the ins and outs of how this all hangs together then stick with me.
Clear Down Existing Docker Components
Before starting, ensure you remove any current installation of Docker Desktop (taking appropriate backup measures as required). Navigate to ‘Settings -> Apps & features -> Search for Docker Desktop‘ and select uninstall. With this removed, you are primed to install WSL 2 on Windows.
Install WSL 2 (Ubuntu)
You do have options around which Linux distribution you want, but for ease and brevity (and familiarity if I am being brutally honest) I moored myself up to Ubuntu.
To install WSL run the following command from the terminal (I’m using the PowerShell terminal inside VS Code):
wsl --install -d ubuntu
After running this command you should see an Ubuntu terminal pop into existence. Provide a default UNIX user account name of your choice and provide a password (and confirm it) when prompted.

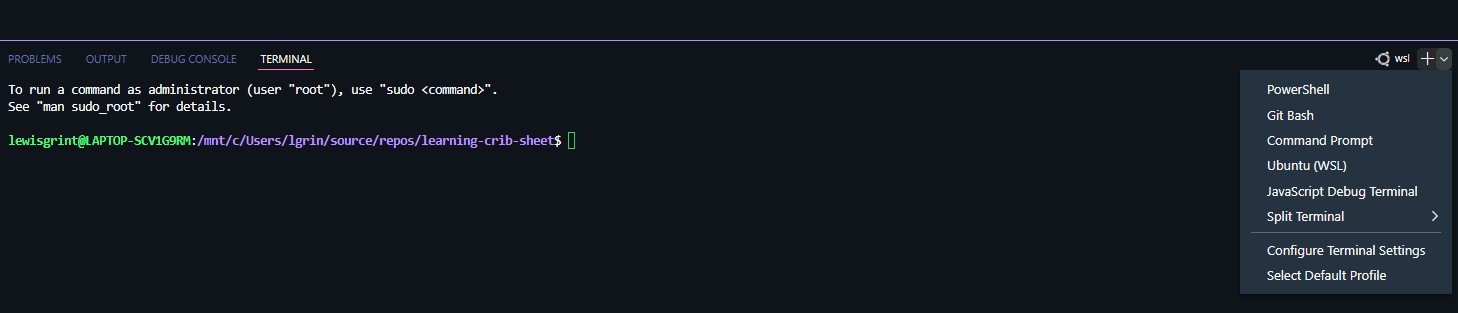
With the installation complete, I noted that VS Code added a Ubuntu (WSL) option for use when creating new terminal windows, nice!
I’ve gone through this process a couple of times and it is possible that version 1, instead of 2, can be installed. Verify this by using the following command (back in PowerShell for the moment):
wsl -l -v
Check the version as follows:

If you are running version 1, this can be easily altered by using the following command:
wsl --set-version Ubuntu 2
Install the Docker Engine on Ubuntu
There are a handful of steps to skip through, but nothing too arduous. We’ll start with creating a Docker repository and then move through to installing the Docker Engine (and even taking this for a test drive with Docker Compose).
Setup a Docker Repository
For the next set of commands we will be executing these using the Ubuntu (WSL) terminal in VS Code (or something like Bash if you are connected to WSL already).
As you can see from my screenshot when I ran ‘wsl -l -v‘ I hadn’t yet uninstalled Docker Desktop. At this stage, I backtracked and uninstalled it (which you, if you are following this guide, should have already done so). Then, for sanity, I ran the following to ensure I have all Docker components fully removed:
sudo apt-get remove docker docker-engine docker.io containerd runc
A prerequisite to installing the Docker Engine itself is to set up a Docker repository. Once in place, you can install and update Docker from this repository.
In order to resynchronise ‘apt‘ package indexes (from source) run this command:
sudo apt-get update
Next, we allow the ‘apt‘ package tool to use a repository over HTTPS. (press ‘Y‘ and ‘Enter‘ when prompted to continue):
sudo apt-get install \
    ca-certificates \
    curl \
    gnupg \
    lsb-release
To save from any security headaches we next retrieve the official Docker GPG key:
curl -fsSL https://download.docker.com/linux/ubuntu/gpg | sudo gpg --dearmor -o /usr/share/keyrings/docker-archive-keyring.gpg
I want to tie in a couple of useful resources I found whilst digging around for specific information around GPG keys, so feel free to leaf through these resources yourself if this is of interest:
How To Use GPG to Encrypt and Sign Messages
Why do we require a GPG key downloading Docker packages?
In essence, we want to ensure we are dealing with unmodified and secure source material when downloading packages.
To finish configuring a stable repository execute this to polish off the repository setup:
echo \
  "deb [arch=$(dpkg --print-architecture) signed-by=/usr/share/keyrings/docker-archive-keyring.gpg] https://download.docker.com/linux/ubuntu \
  $(lsb_release -cs) stable" | sudo tee /etc/apt/sources.list.d/docker.list > /dev/null
Install the Docker Engine
Installation of the Docker Engine itself is a piece of cake. If required, retype your password (as required for ‘sudo‘ operations). To begin, we download all package information for configured sources (again, for safety):
sudo apt-get update
Press ‘Y‘ and then ‘Enter‘ to confirm that you want to proceed here. We then install the latest versions of Docker Engine and ‘dockerd‘ (a process for Container management):
sudo apt-get install docker-ce docker-ce-cli containerd.io
Then kickstart Docker into life, like so:
sudo service docker start
We can then run a quick verification check. To see what version of Docker is running pop through the following command:
docker -v
You should see a verification message, akin to (but with a different version in all likelihood):
Docker version 20.10.14, build a224086Manage Docker as a Non-Root User
Adding your specific UNIX user to the ‘docker‘ group is a particularly nice layer of frosting on the cake, that allows the running of Docker commands as the non-root user.
The ‘docker‘ group already existed in my case; I assume that the engine installation created this for me. You are able to verify this with the following command regardless, and this will prompt if the group already exists:
sudo groupadd docker
To add your UNIX user to the group, run this command (use ‘CTRL+D‘ after this command to close WSL, in order for the changes to take effect – then create a new WSL terminal to continue):
sudo usermod -aG docker $USER
You can also run this to activate changes to a group without logging out (but logout anyway if you have issues):
newgrp docker
Verify Docker Engine Installation
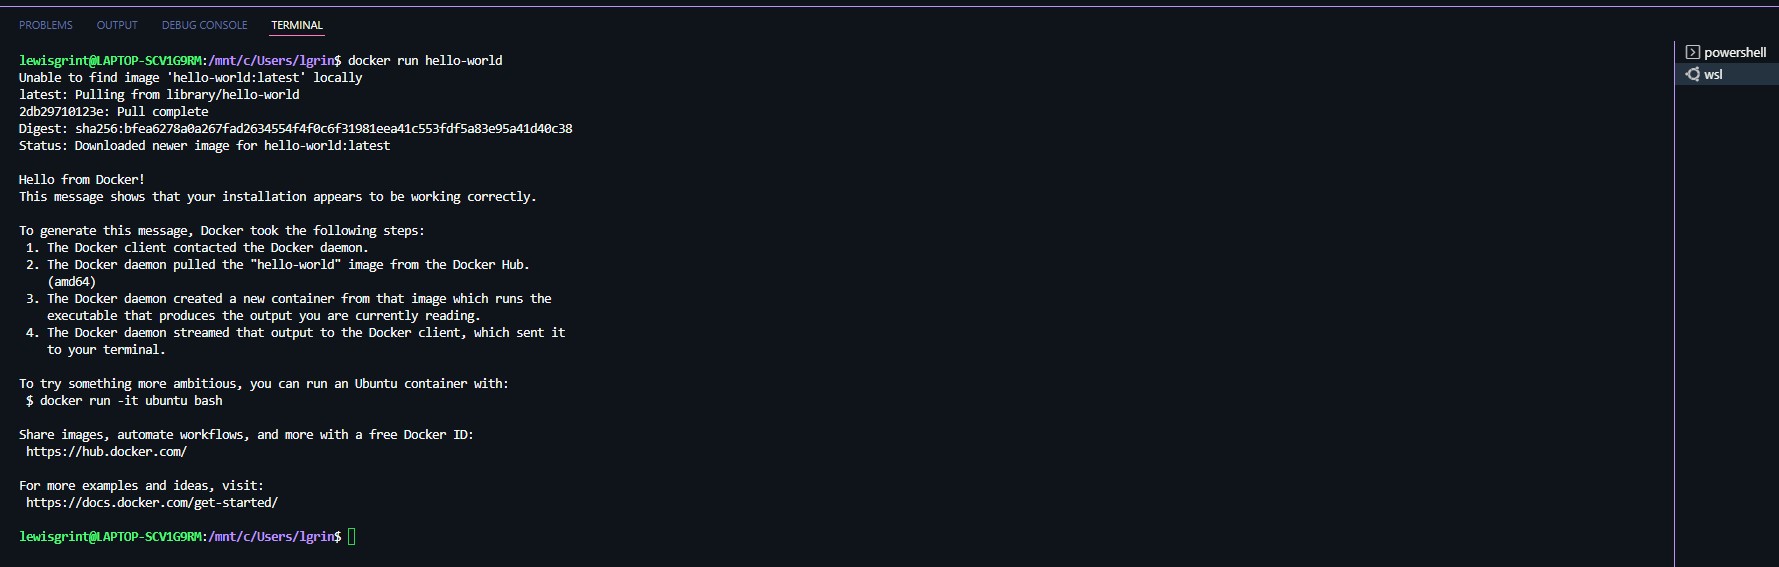
Let’s run the Docker hello-world Image as a full-blown confirmation that we are ready to rock and roll:
docker run hello-world
You should see, all things being well, messaging like this:
Key Tooling and Extensions
Two key extensions to obtain at this point, before going any further, are ‘Remote – WSL‘ and ‘Docker Explorer‘. Remote WSL enables you to connect to and open folders within WSL, enabling you to open a version of VS Code in the context of WSL. With VS Code connected to WSL, you can add extensions just to this particular flavour of VS Code; this is where Docker Explorer comes in. When installing Docker Explorer in the WSL connected application context, extra functionality is added to the standard Explorer sections, allowing management of Images and Containers using GUI components.
Start with installing Remote WSL in VS Code, as shown:

Then, on the footer bar in VS Code, in the bottom lefthand corner, you can ‘Open a Remote Window‘:

This will open a subset of command palette options where you can select a ‘New WSL Window‘:

Picking this will launch a new instance of VS Code bound to WSL Ubuntu. So far, so good!

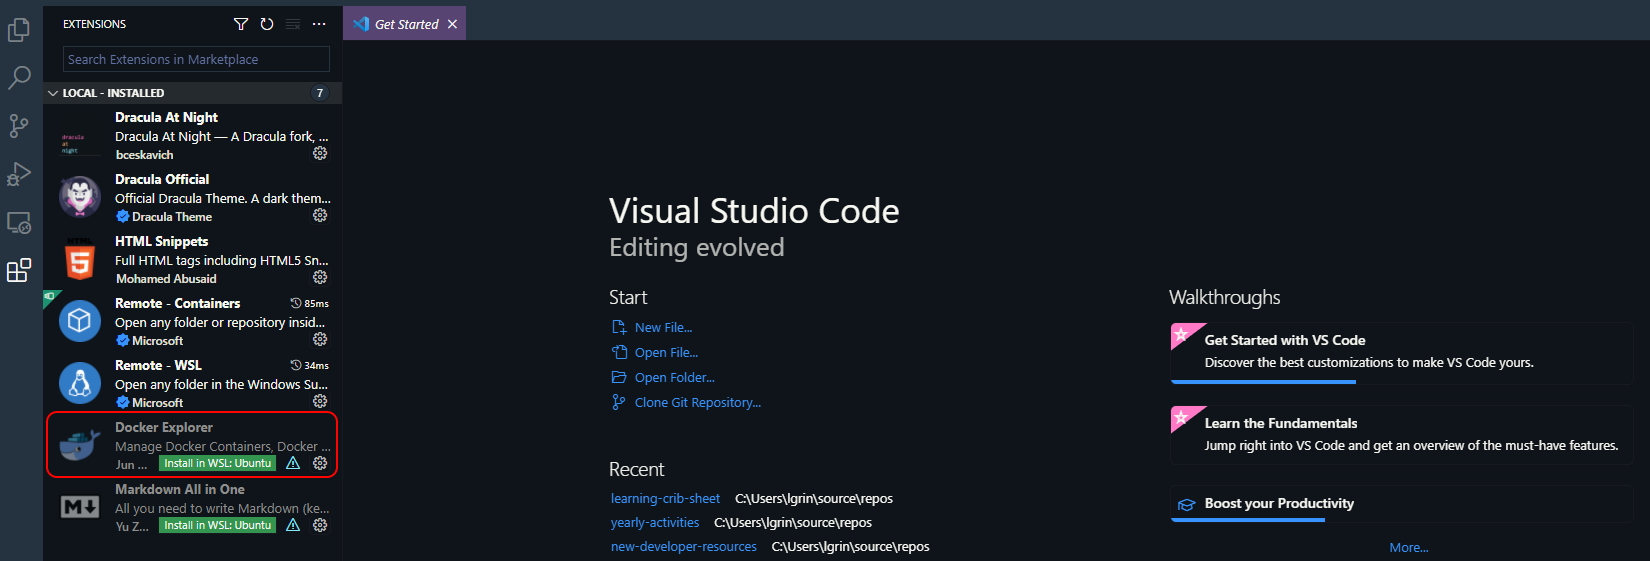
Inside this new window instance, we then need to hunt out Docker Explorer. I very much messed up here on my first run through and installed this as an extension in the wrong environment, if you happen to do this by mistake you’ll see, as per my second screenshot below, that VS Code will prompt you to ‘Install in WSL: Ubuntu‘:

In the WSL VS Code window you should now see these additional sections in the Explorer where you can manage Images and Containers (double-clicking an entity will run a command to get filtered details for the particular Container):

Spin up a SQL Server 2017 (Latest) Container
As a test run, which we will tear down in short order, let’s try and pull down the latest SQL Server 2017 Image for kicks. Hit up the WSL terminal and start by pulling the Image.
docker pull mcr.microsoft.com/mssql/server:2017-latest
Verify the existence of the Image by running:
docker image ls
Then, let’s spin up a SQL Server instance for the latest 2017 Image that we have just pulled down. Ensure that you specify a strong password in place of ‘{YOUR_STRONG_PASSWORD}‘ (that meets the password requirements for SQL Server):
docker run -e "ACCEPT_EULA=Y" -e "SA_PASSWORD={YOUR_STRONG_PASSWORD}" -p 1433:1433 -d mcr.microsoft.com/mssql/server:2017-latest
Once this is completed, verify the Image is up and running as follows:
docker container ls
If you specify a password that does not meet the SQL Server requirements you may find that the Container doesn’t startup, which isn’t an issue as we’ll be deleting this momentarily to pull Images and spin up Containers using Docker Compose. The Container may be in a restart/retry loop, but you can check that it exists by running:
docker container ls -a
Image and Container Deletion
Before doing anything with Docker Compose let’s scrub our environment and remove the current SQL Server Container and Image, which is easily done using the following two commands in sequence. Simply substitute in your Container and Image Names, as generated by Docker, in place of the ‘{NAME}‘ placeholder (details can be obtained through the use of the ‘docker container ls‘ command):
docker container rm {NAME} -f
docker image rm {NAME}
The ‘-f‘ here forces a Container to be deleted even when it is currently running.
With the housekeeping fully in-check we can now pull down Images and spin up Containers using Docker Compose, which is where things get more fun (and a touch more powerful).
Switch Up to using Docker Compose
In my use case, I have created a simple ‘docker-compose.yml‘ file that is designed to provide a stock SQL Server (2017) setup alongside a MongoDB instance, with Mongo Express in play so I have a basic web frontend.
To begin, you’ll need to install the latest version of Docker Compose. Use this link as a reference to get the scoop on what the latest version is. Once known, you can (being aware of the version embedded here), run these two commands to install Docker Compose and apply executable permissions to the binary, respectively:
sudo curl -L https://github.com/docker/compose/releases/download/1.29.2/docker-compose-`uname -s`-`uname -m` -o /usr/local/bin/docker-compose
sudo chmod +x /usr/local/bin/docker-compose
You can use the following example ‘docker-compose.yml‘ file as a guide. At the time of writing this guide, the latest Image for mongo-express was pulling a pre-alpha version, which caused complete and utter chaos with my local setup. Please review all versions and ensure you are happy with the settings before proceeding.
version: '3.1'

services:
  sql-server-db:
    container_name: sql-server-db
    image: mcr.microsoft.com/mssql/server:2017-latest
    restart: always
    ports:
      - "1433:1433"
    environment:
      SA_PASSWORD: "{YOUR_STRONG_PASSWORD}"
      ACCEPT_EULA: "Y"
  mongo:
    image: mongo:latest
    container_name: mongo-db
    restart: always
    environment:
      MONGO_INITDB_ROOT_USERNAME: root
      MONGO_INITDB_ROOT_PASSWORD: {PASSWORD}
    ports:
      - 27017:27017
  mongo-express:
    image: mongo-express:0.54
    container_name: mongo-express
    restart: always
    ports:
      - 8081:8081
    environment:
      ME_CONFIG_MONGODB_ADMINUSERNAME: root
      ME_CONFIG_MONGODB_ADMINPASSWORD: {PASSWORD}
    depends_on:
      - mongo
The Mongo passwords (and other values, such as ports) do not require quotes, although the convention here is something to be investigated further. You’ll also note that ‘restart: always‘ is specified, which means you will not have to manually start Containers in future when Docker springs into life.
Place a file called ‘docker-compose.yml‘ into your Windows file system with the above content, I have placed this in a folder called ‘DockerCompose‘ in the root of the C drive. Then, within a WSL terminal window you can access a Windows folder using ‘/mnt‘, I changed my directory to this location using this command:
cd /mnt/c/dockercompose
Magic! We are ready and set to use execute Docker Compose:
docker-compose up
Verify Setup
Verifying you are in a good spot isn’t too tricky. First, in VS Code, verify that Containers are present and running (denoted with a green colour), as illustrated:

Next, let’s take Mongo Express for a spin by attempting to access it via localhost on port 8081 (the default port for this installation). You should see the web interface in all its glory:

For SQL, if you have SSMS (although there are other ways, including a CLI interface, to verify this works) you can follow this process. The first thing you’ll need is the generated Container name for SQL Server, which you can obtain using ‘docker container ls‘:

With this in hand, pop on over to SSMS and adjust the ‘Server name‘ using the following convention, ensuring you use the ‘sa‘ password you specified in your ‘docker-compose.yml‘ file during setup (the port should be ‘1433‘):
convention: 127.0.0.1\{container-name}, {container-port}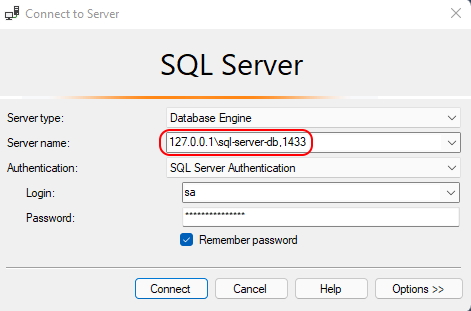
You should now be connected to your SQL instance running in Docker!
It is possible to right-click on any Container entity in VS Code and ‘Inspect‘ (get configuration details), get ‘Statistics‘ or scour the ‘Logs‘ as required, so you’ve always got plenty of actions you can take if you end up getting caught out.
WSL Refinements
Docker Desktop provides a good amount of control over how resources are allocated to Containers in addition to management functions. Thankfully, you are free to tailor and smarten up your configuration with two additional puzzle pieces; the ‘.wslconfig‘ and ‘wsl.conf‘ files. Note: the ‘wsl.conf‘ applies to Windows 11 only (and some settings in the ‘.wslconfig‘ are Windows 11 specific also, so read the documentation for more details on that).
The ‘.wslconfig‘ is used to configure settings globally across all installed distributions running on WSL 2 and is stored in your ‘%UserProfile%‘ directory. On the flipside, the ‘wsl.conf‘ is used to configure settings per-distribution for Linux distributions running on WSL 1 or WLS 2 and is stored in the ‘/etc‘ directory of the distribution as a UNIX file.
Inside my WSL connected VS Code window, using the terminal, I had to apply permissions to the target directory to add my ‘wsl.conf‘ file (I applied the permissions globally by using ‘/’, but the snippet below, in retrospect, would have been sufficient):
sudo chmod a+rwx /etc
I then added my file to the Ubuntu directory, under ‘/etc‘ as shown (with the following content):
[boot]
command = service docker start

This file contains a simple command that, on startup of WSL 2, ensures that Docker kicks into life and starts (breathing life into Containers set to auto-start).
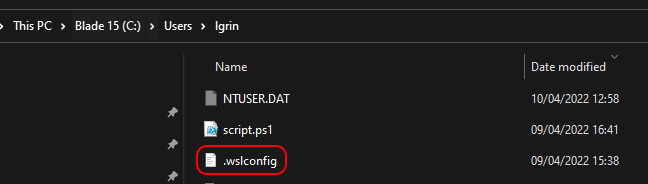
Back over in Windows, in my user profile directory, I then added the ‘.wslconfig‘ file with the following goodies in tow:
# Settings apply across all Linux distros running on WSL 2
[wsl2]

# Limits VM memory to use no more than 4 GB, this can be set as whole numbers using GB or MB
memory=2GB

# Sets the VM to use two virtual processors
processors=2

# Turn off default connection to bind WSL 2 localhost to Windows localhost
localhostforwarding=true

# Turns on output console showing contents of dmesg when opening a WSL 2 distro for debugging
debugConsole=true
This mimics some of the settings commonly tweaked in Docker Desktop. Here, I set VM resource limits (VMs that back my Docker resources), setup localhost to Windows localhost port forwarding (yes, I got lost in hours of port forwarding headaches without this!) and have allowed the debug console to be visible when WSL kicks into gear (you can adjust this to your heart’s content).
For a full list of features set the wsl-config article for further details.
Uh-oh – But I am on Windows 10
And yes…I lost some time here! In order to start the docker service on Windows 10 you’ll need to add some additional code to the ‘/etc/profile‘ file (in the Linux file system). You may need to relax permissions on this file also. To get the appropriate permissions to make the modification run the following:
sudo chmod a+rwx /etc/profile
Then add this additional code to the ‘profile‘ file:
if service docker status 2>&1 | grep -q "is not running"; then
    wsl.exe -d "Ubuntu" -u root -e /usr/sbin/service docker start >/dev/null 2>&1
fi
Bonus – Extra Tooling
If (because I got lost in a networking/port forwarding nightmare for a couple of hours unnecessarily but I’m sure you’ll have a better reason!) you are interested in manipulating the network settings used by the Linux kernel you can install this package tool:
sudo apt install net-tools
Actually…Another Bonus – Starting WSL on Windows Startup
For extra brownie points and cherries on top, you could opt to start WSL on boot of Windows. This article looks like a great starting point to get you squared away:
How to Run WSL2 at Startup on Windows
Over to you!
Well, this was a tonne of fun to produce so I hope you get some use and/or enjoyment out of this. As always, I would love to hear about any trials and tribulations you’ve had around WSL 2 and Docker, including any amazing tidbits you have up your sleeve.
Until the next time, happy coding out there! 💻
Resources/Useful Links
Helpful links that were fantastic resources as I pieced together this article, please check them out:
- Install WSL
- Install Docker on Windows (WSL) without Docker Desktop
- Install Docker Engine without Docker Desktop on Windows
- Docker on WSL2 without Docker Desktop
- How To Live Without Docker Desktop — A Developer’s Perspective
- Run Docker in WSL (Windows 10/11) without Docker Desktop
- .NET Development in Docker with Dev Containers
