Fresh off the back of the excellent Microsoft Build I wanted to try out the CICD capabilities directly inside GitHub; aka GitHub Actions (although ‘Actions’ aren’t specifically limited to this area).
Getting started is absolutely free, with 2000 workflow minutes per month available right off of the bat (increasing based on your account type). The process is mainly painless, to be honest; however, I’ve included all of the times I fell reeling into the pit in the hopes you’ll dodge the bullets.
What are GitHub Actions?
GitHub Actions are, in essence, ‘triggers’ that are fired when GitHub events are kicked into motion. They are for the building, testing and deployment of code alongside the automation of your coding workflows (think actions for assessing code quality or scanning your repository for secrets periodically). The ecosystem is growing; see the full marketplace here. I’ll be focusing on the build, test and deployment of a simple ASP.NET Core Web Application.
Getting Started
You’ll need:
- A GitHub account (free is perfectly fine).
- A repository to get you going (a private repo, again, totally works so no issues there).
Here is the starter configuration I’ve gone with:

I’ll be working inside Visual Studio, hence the choice of the Visual Studio ‘.gitignore’. The repository is set to private and initialised with a ‘README’ so I can get on with cloning this straightway. I’m using the GitHub desktop client this time around but use whatever floats your boat (Fork, GitKraken, command line, etc.) will suffice.

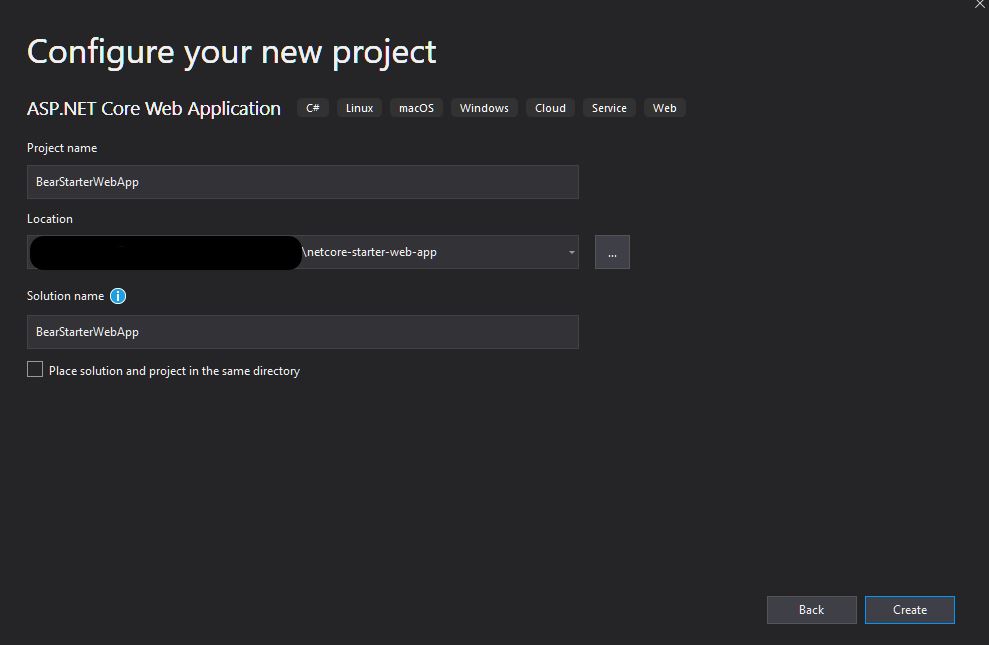
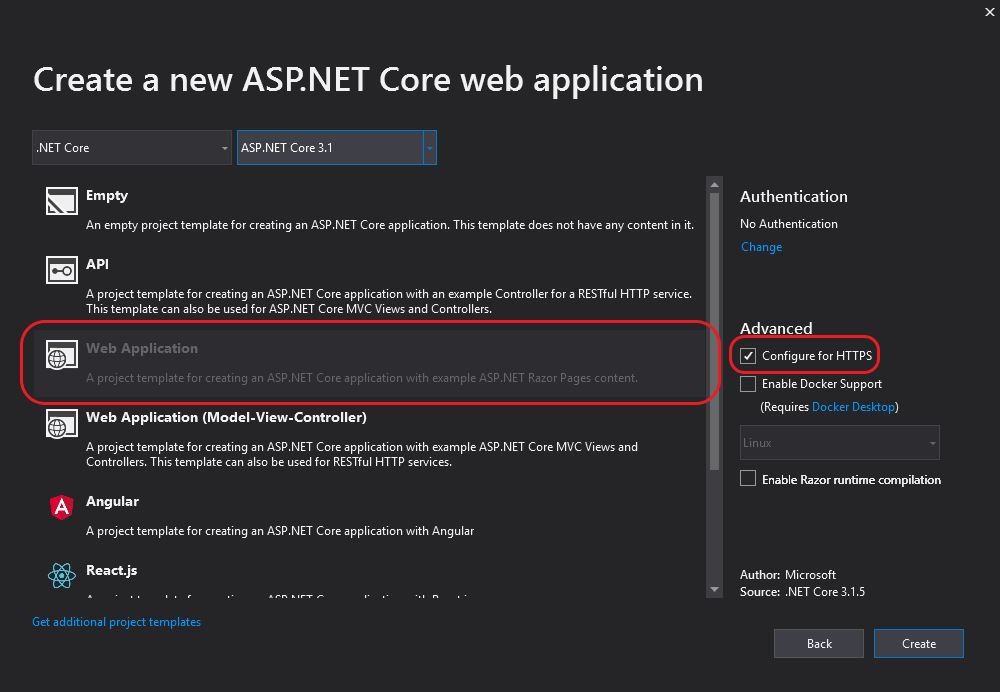
After cloning, using the URL from GitHub, I’ll get started with making the sample application in the newly created repository. I’m going to use the template application as we’re only interested in a demonstration of GitHub Actions. Inside Visual Studio create an ‘ASP.NET Core Web Application’ using the ‘Web Application’ template. I’ve configured the project to use HTTPS and am looking to target .NET Core 3.1.
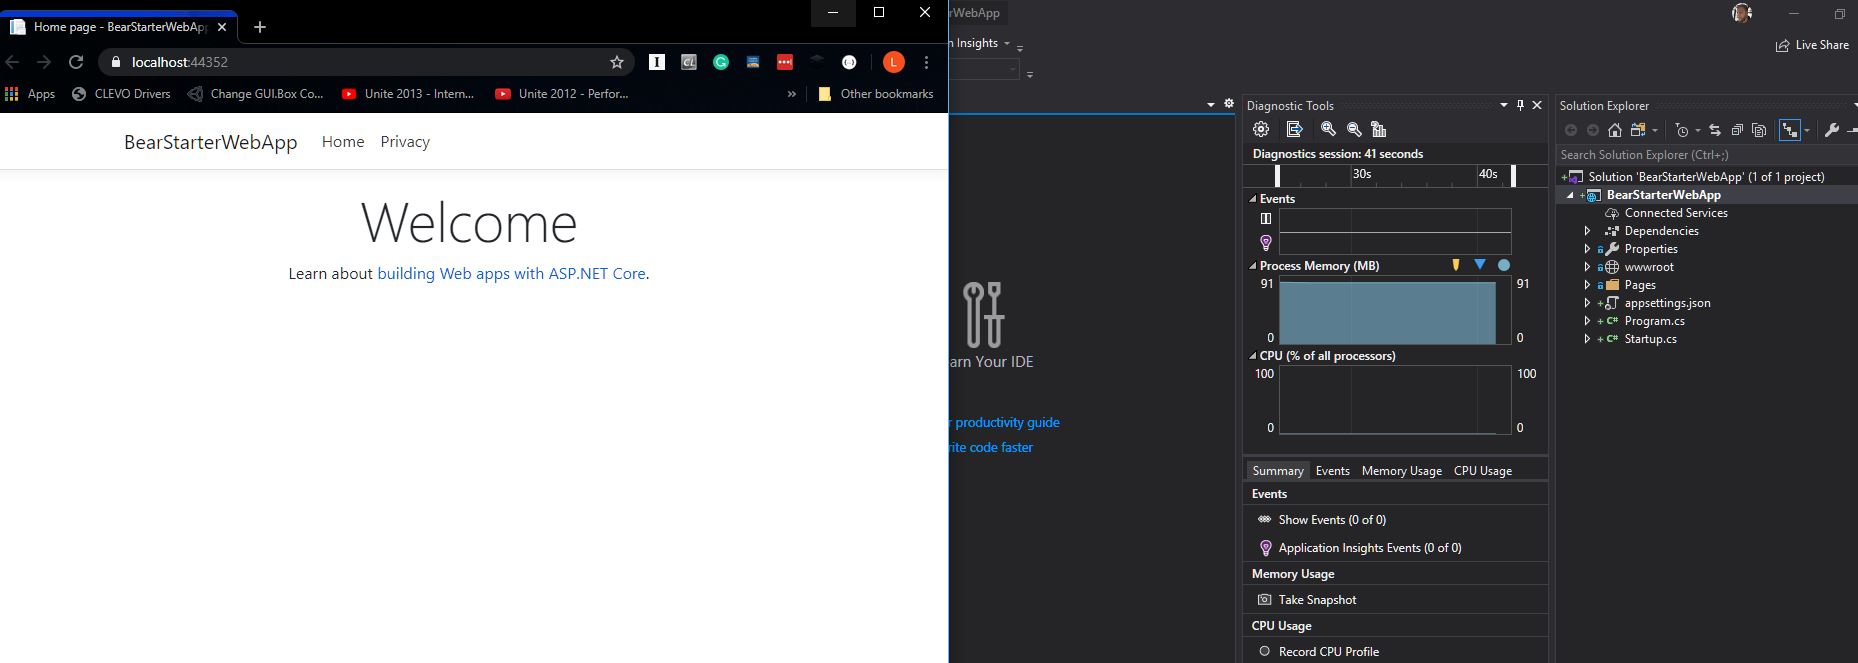
At this point, run up the application and confirm it compiles and runs:
Great stuff, we now have an application to build a workflow against. At this point, we’ll add an ‘xUnit Test Project’ and add one, fake test so we can include a test step in our workflow later on.

Create a commit and push the code up to the master branch, we’re back off to the GitHub web interface.
Adding a GitHub Action
Back in the web interface, the following link will be available for creating our first action. I will say that, at this time, I would probably defer off the task of creating an action to the Azure ‘Deployment Center’ interface for reasons you’ll see later on (I’m sure this won’t be a long-standing issue though). But, to show you my full end-to-end experience here is how I got on.
Click the link shown here:

At this point, you’ll receive suggestions as to what actions might be appropriate based on the type of your repository. Here, I selected the .NET Core option by clicking the ‘Set up this workflow’ button.

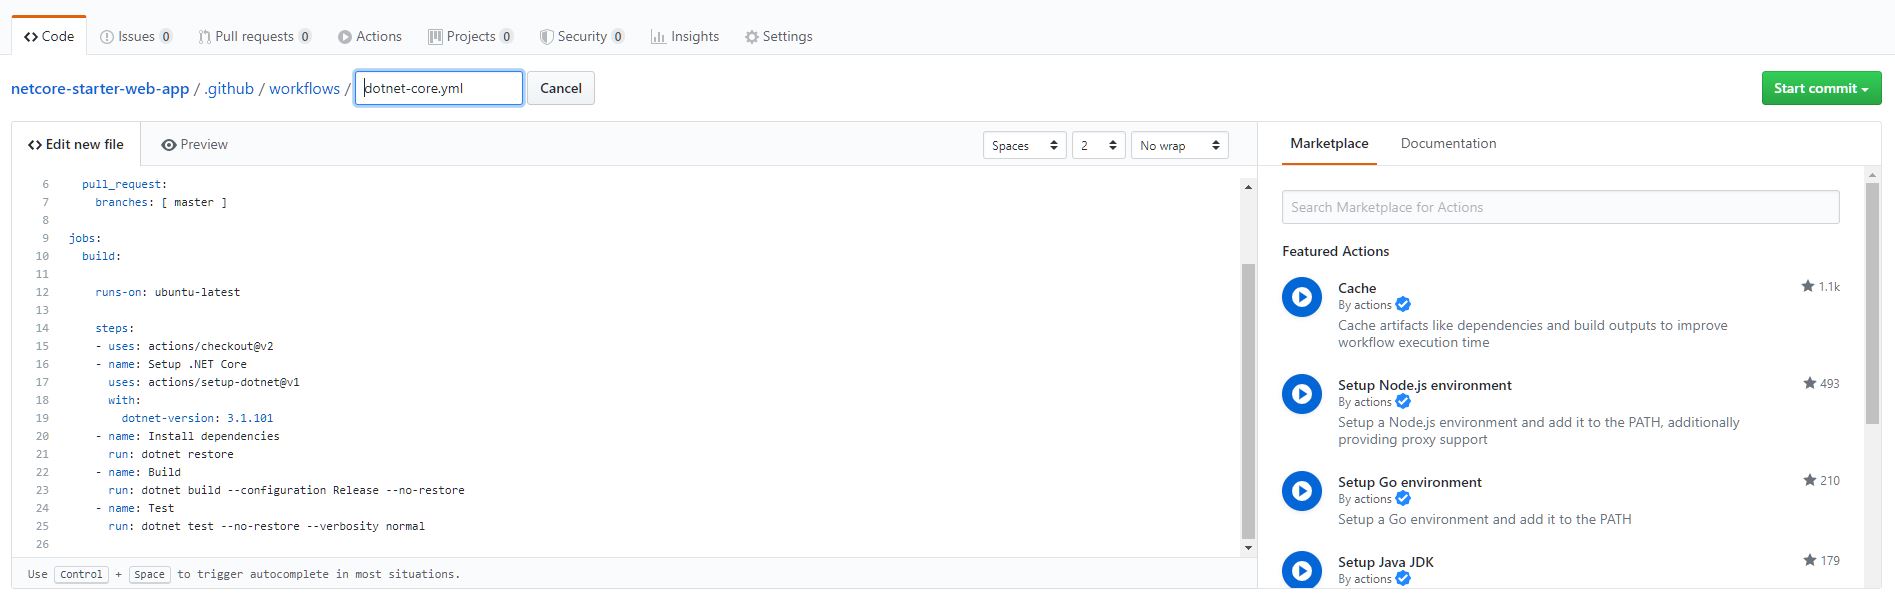
Great, we’re well on our way to configuring up a build, test and deploy pipeline. The next screen that is presented allows you to name the GitHub Action configuration file (which takes the form of a YAML mark-up file), as well as browse the marketplace for other actions of interest. When finished, you can click the ‘Start commit’ button to create a branch/pull request or be rogue (as I am going to be) and commit directly to the master branch. 🙂
Notice how the new configuration file is created inside the ‘.github/workflows’ folder. Here is the ‘.yml’ file structure that I started with:
name: .NET Core

on:
  push:
    branches: [ master ]
  pull_request:
    branches: [ master ]

jobs:
  build:

    runs-on: ubuntu-latest

    steps:
    - uses: actions/checkout@v2
    - name: Setup .NET Core
      uses: actions/setup-dotnet@v1
      with:
        dotnet-version: 3.1.101
    - name: Install dependencies
      run: dotnet restore
    - name: Build
      run: dotnet build --configuration Release --no-restore
    - name: Test
      run: dotnet test --no-restore --verbosity normal
This is where I made the first misstep, which may also catch you out depending on the directory structure of your target project. With my repository, the ‘solution’ file is nested within the ‘BearStarterWebApp’ folder, meaning the working directory needs amending slightly for the steps outlined in the YAML file. Here’s the error that I first received after committing this file, with the results accessible via the ‘Actions’ link in the header section of the repository:

Thankfully, this isn’t too difficult to fix. I made the following modifications to the ‘dotnet-core.yml’ file so that all jobs run, by default, inside the nested ‘BearStarterWebApp’ directory. I also increased the version of .NET Core (inside the ‘actions/setup-dotnet@v1’ step) being used to ‘3.1.201‘.
name: .NET Core

on:
  push:
    branches: [ master ]
  pull_request:
    branches: [ master ]

jobs:
  build:

    runs-on: ubuntu-latest
    defaults:
      run:
        working-directory: BearStarterWebApp

    steps:
    - uses: actions/checkout@v2
    - name: Setup .NET Core
      uses: actions/setup-dotnet@v1
      with:
        dotnet-version: 3.1.201
    - name: Install dependencies
      run: dotnet restore
    - name: Build
      run: dotnet build --configuration Release --no-restore
    - name: Test
      run: dotnet test --no-restore --verbosity normal
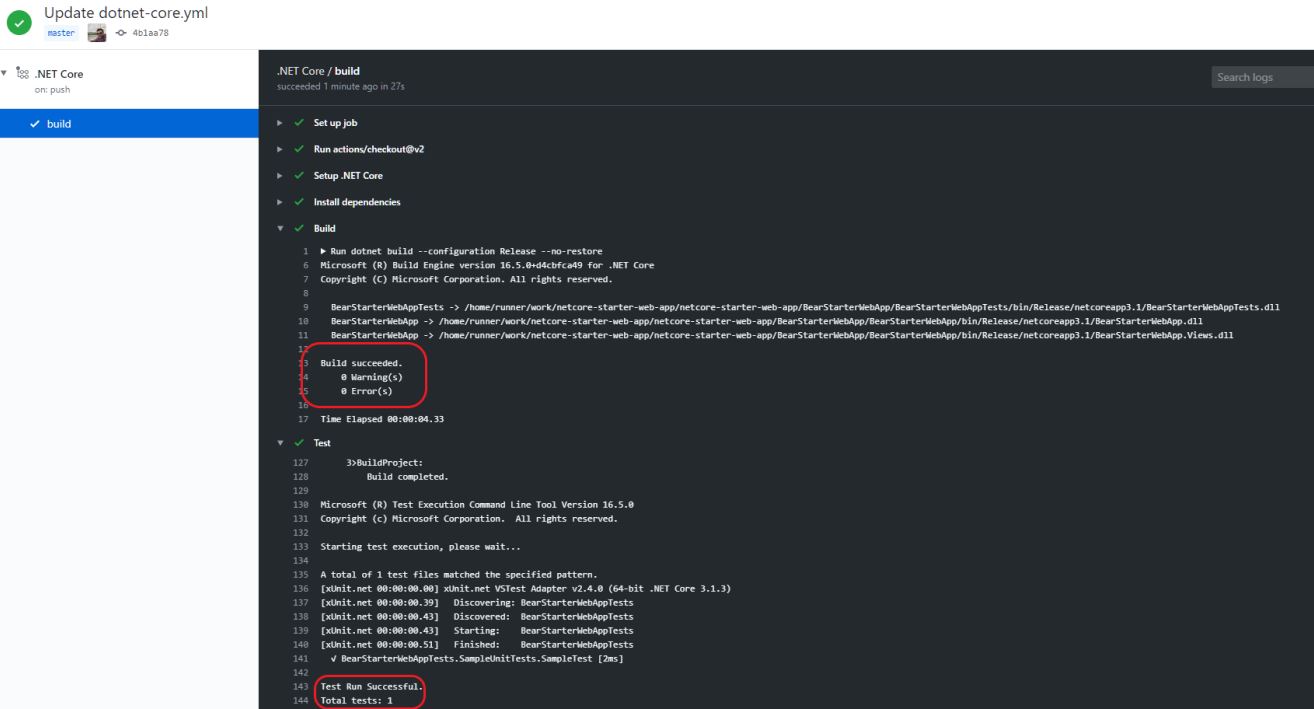
With these changes in tow, we have a bit more success:
The next phase is to wrap this all up in a bow and chain everything through to a Web App running in Azure.
Setting up Auto-deployment to an Azure Web App
Let’s shift gears and head on over to the Azure Portal (you’ll need an account to follow on from here on out). On the ‘Home’ page select ‘Create a resource’ and search for and create a ‘Web App’:

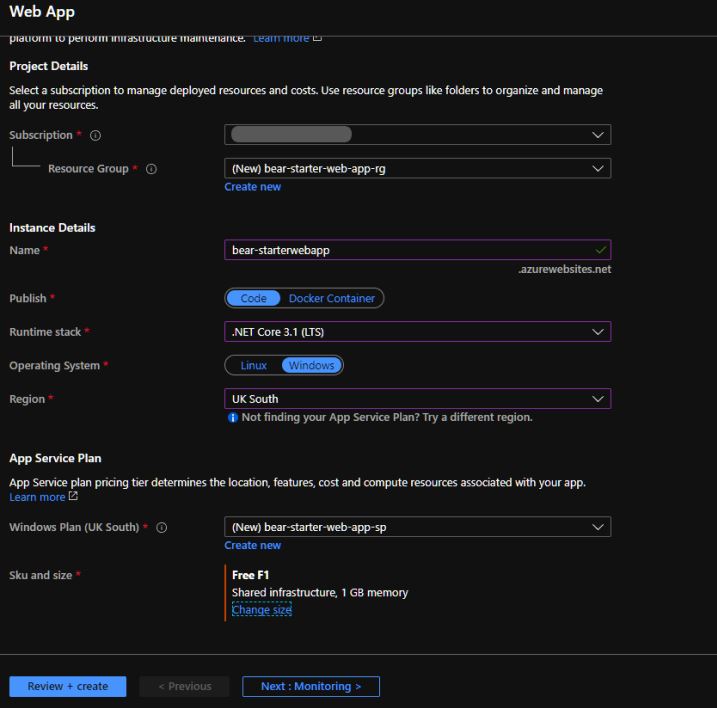
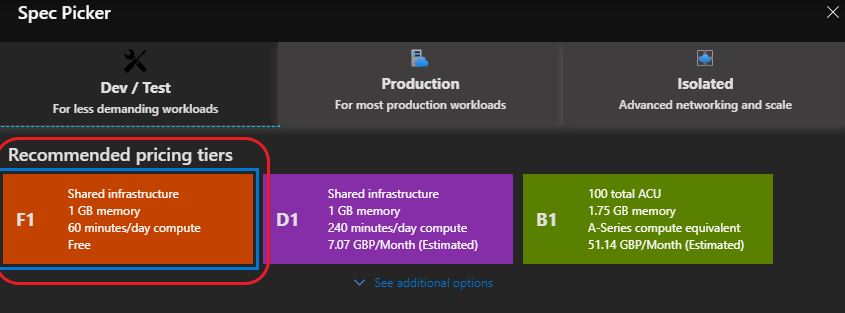
On the Web App configuration screen, you just need, for the purposes of this sample, to fill out the details on the ‘Basics’ tab only. You’ll need a subscription at this point. A resource group is used to logically group your, well, resources (I’ve created a new one for this sample). A word of warning, make sure you select the (if using Windows as I am) a new/existing App Service Plan that targets a ‘Free F1’ instance. Notice also that I am targeting .NET Core 3.1. Pick the region of your choice and we’re nearly there!
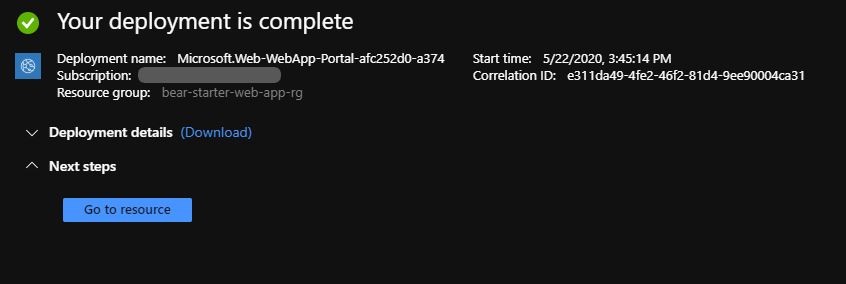
Click ‘Review + create’ to continue ensuring all of the settings are correct (Runtime stack/App Service Plan, etc.) and then click ‘Create’ to provision the new web application. The deployment of this will take a few moments after which you’ll be able to click the ‘Go to resource’ button:
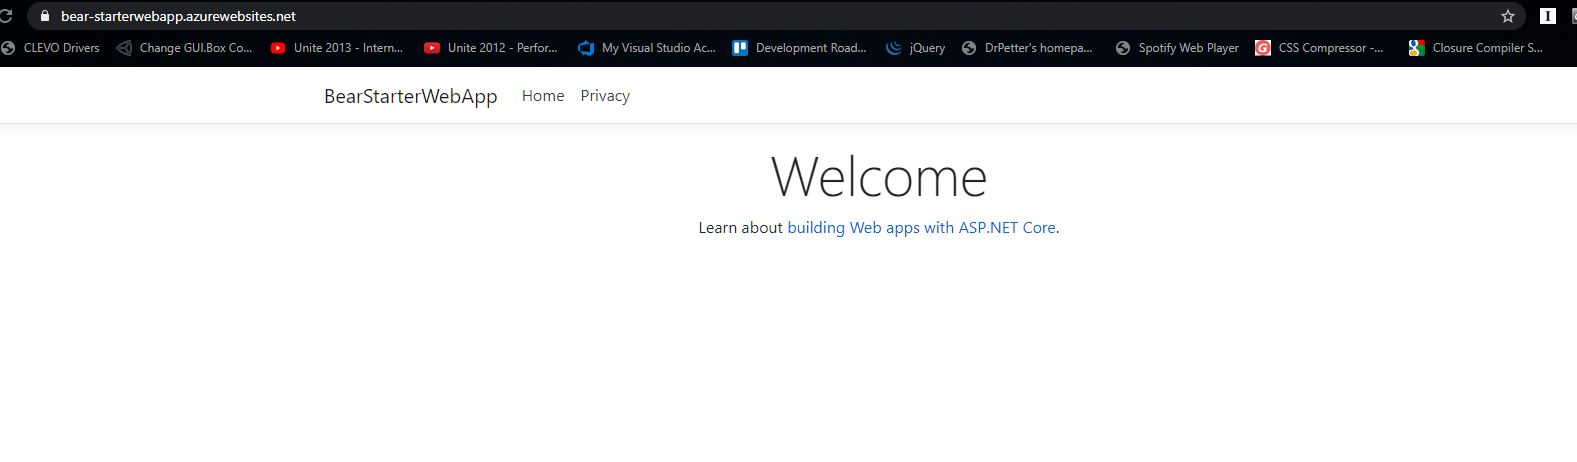
You should now be able to browse to the newly created application:

Awesome, our web application is running but of course is not tied to our source code in GitHub in any way…yet. This can be achieved via the tooling available in the ‘Deployment Center’ module, using the ‘GitHub’ CICD option (you’ll have to allow Azure permissions to make changes to your repository by following the prompts during your first run through).

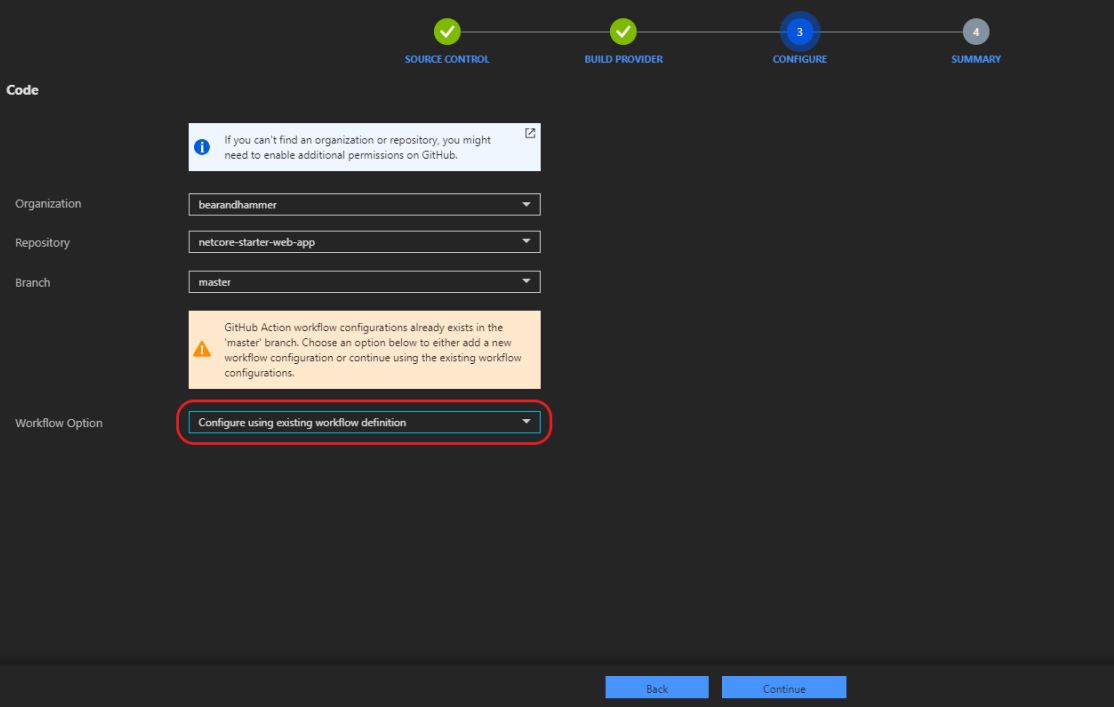
Next up, select the ‘GitHub Actions (Preview)’ option and select the details of your account (‘Organization’), ‘Repository’, target ‘Branch’ along with the ‘Runtime Stack’ and ‘Version’:

NOTE: Things went slightly awry for me here so read this just for the ‘experience’ and also to correct me in the comments below. To see how I got this working, skip to the ‘A Working Build Provider’ section.
Whether I was doing something subtly wrong or this was just a preview issue (I can’t be 100 percent sure) I couldn’t get the ‘Configure using existing workflow definition’ to function correctly. My guess is that this is supposed to modify/retrofit the existing ‘.yml’ file in the target repository with the additional ‘steps’ to deploy code to Azure.
Tangent alert! As I write this post I have a theory to test. When using the options specified above the resulting configuration was looking for a file called ‘master_bear-starterwebapp.yml’ in my repository (that was not created by default and, of course, didn’t exist, to begin with). Going along with the idea that this ‘naming’ is by convention I decided to change the name of the configuration file in my repository (via a quick commit) from ‘dotnet-core.yml’ to ‘master_bear-starterwebapp.yml’. Then, after that was committed, I created the Build Provider as above.
The result was….no dice! If anyone reading this has any thoughts on this then feel free to let me know in the comments below. It could well be (and reading the messaging again could support this) that this isn’t how it is supposed to work at all, with you needing to always manually adjust your configuration file. A misunderstanding on my part is the likely outcome here! Either way, it’s not too difficult to do this, as seen next.
A Working Build Provider
Instead, at this point, I created the build provider using the ‘Add or overwrite workflow definition’ option:

As you guessed, this creates a brand new GitHub Action definition file in the repository (which, as I stated earlier, is why it may make sense to just use the Azure route to creating this kind of configuration, for now at least).
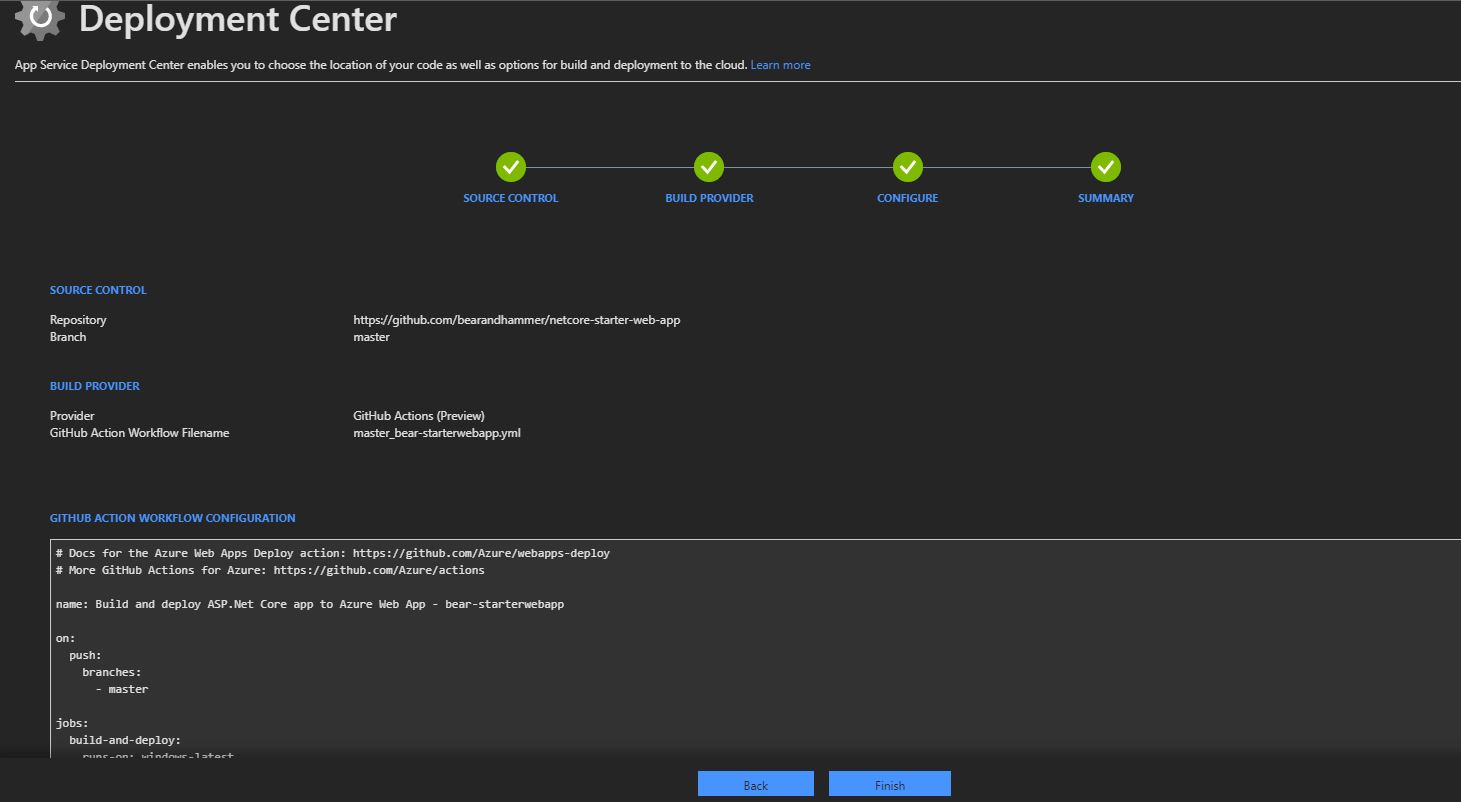
The content of the configuration file that it creates for you looks like this:
# Docs for the Azure Web Apps Deploy action: https://github.com/Azure/webapps-deploy
# More GitHub Actions for Azure: https://github.com/Azure/actions

name: Build and deploy ASP.Net Core app to Azure Web App - bear-starterwebapp

on:
  push:
    branches:
      - master

jobs:
  build-and-deploy:
    runs-on: windows-latest

    steps:
    - uses: actions/checkout@master

    - name: Set up .NET Core
      uses: actions/setup-dotnet@v1
      with:
        dotnet-version: '3.1.102'

    - name: Build with dotnet
      run: dotnet build --configuration Release

    - name: dotnet publish
      run: dotnet publish -c Release -o ${{env.DOTNET_ROOT}}/myapp

    - name: Deploy to Azure Web App
      uses: azure/webapps-deploy@v1
      with:
        app-name: 'bear-starterwebapp'
        slot-name: 'production'
        publish-profile: ${{ [SOME_SECRET] }}
        package: ${{env.DOTNET_ROOT}}/myapp
The components added are the ‘Publish’ and ‘Deploy to Azure Web App’ steps. However, we’ve lost the ‘Working Directory’ and ‘Test’ changes we made previously, alongside an ‘action trigger’ point (we want a build triggered on ‘push’ and ‘pull request’ to master).
The Resolution (small amount of tinkering)
Keeping the ‘master_bear-starterwebapp.yml’ in tow I amalgamated this version of the configuration with my previously generated one from GitHub; I’ve opted to still run this against ‘ubuntu-latest’. This gave me the following, working set up:
# Docs for the Azure Web Apps Deploy action: https://github.com/Azure/webapps-deploy
# More GitHub Actions for Azure: https://github.com/Azure/actions

name: Build and deploy Web App

on:
  push:
    branches: [ master ]
  pull_request:
    branches: [ master ]

jobs:
  build-and-deploy:
    runs-on: ubuntu-latest
    defaults:
      run:
        working-directory: BearStarterWebApp

    steps:
    - uses: actions/checkout@v2
    - name: Setup .NET Core
      uses: actions/setup-dotnet@v1
      with:
        dotnet-version: 3.1.201
    - name: Install dependencies
      run: dotnet restore
    - name: Build
      run: dotnet build --configuration Release --no-restore
    - name: Test
      run: dotnet test --no-restore --verbosity normal
    - name: Publish
      run: dotnet publish -c Release -o ${{env.DOTNET_ROOT}}/myapp
    - name: Deploy to Azure
      uses: azure/webapps-deploy@v1
      with:
        app-name: 'bear-starterwebapp'
        slot-name: 'production'
        publish-profile: ${{ [SOME_SECRET] }}
        package: ${{env.DOTNET_ROOT}}/myapp
As the original ‘dotnet-core.yml’ was sparking off an addition workflow I removed it in favour of the modified, Azure injected, file. As you can see this has triggered our build, test deploy pipeline and shows in Azure as a deployment:


Navigating to our web applications URL shows us this has been successful, happy days:
At this stage, I made a quick change to the main ‘index.cshtml’ page by changing the header and adding some content. After pushing this commit the GitHub Action Workflow is triggered, with the whole process (for this trivial example) taking around one minute. Here’s our Web Application deployed and updated!
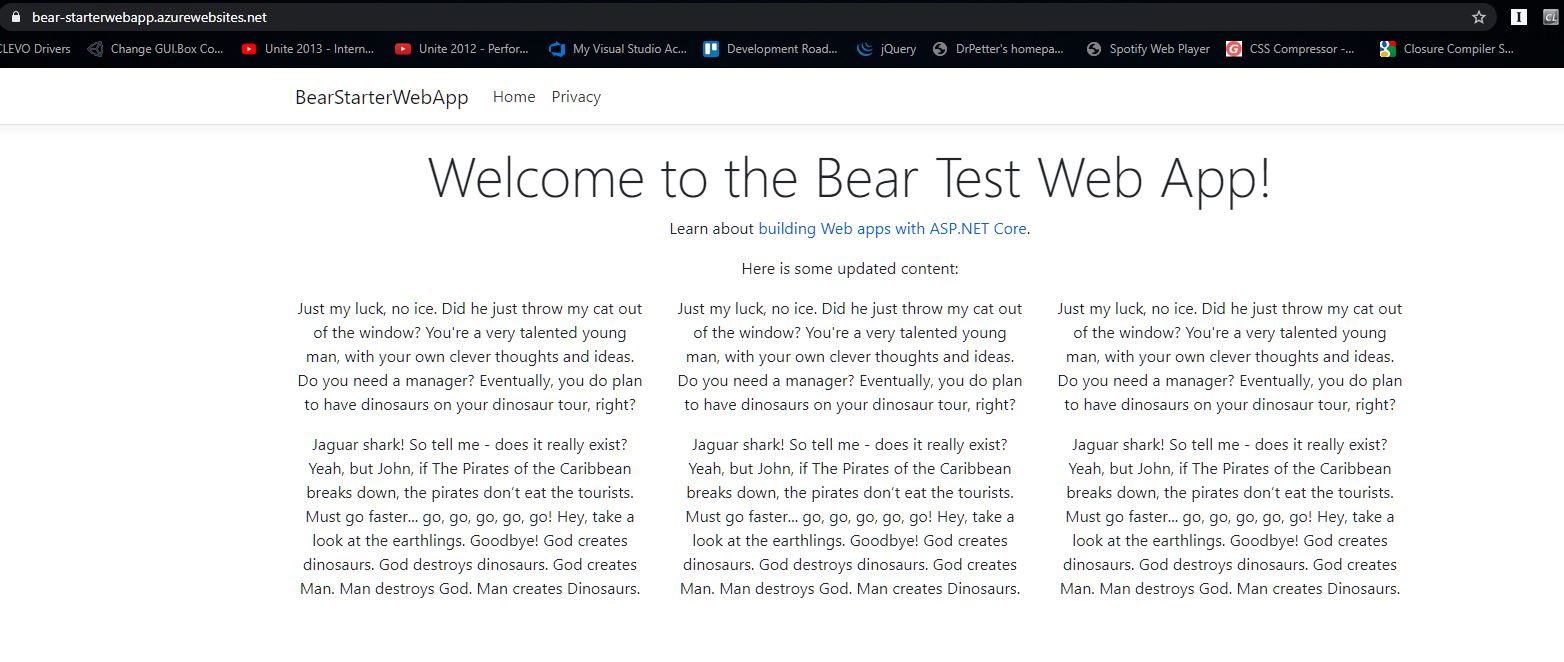
There you have it, a very basic sense of how you can use GitHub Actions for deployment. I hope this proves useful and enjoyable, please feel free to leave comments below. Until the next time have fun coding!
